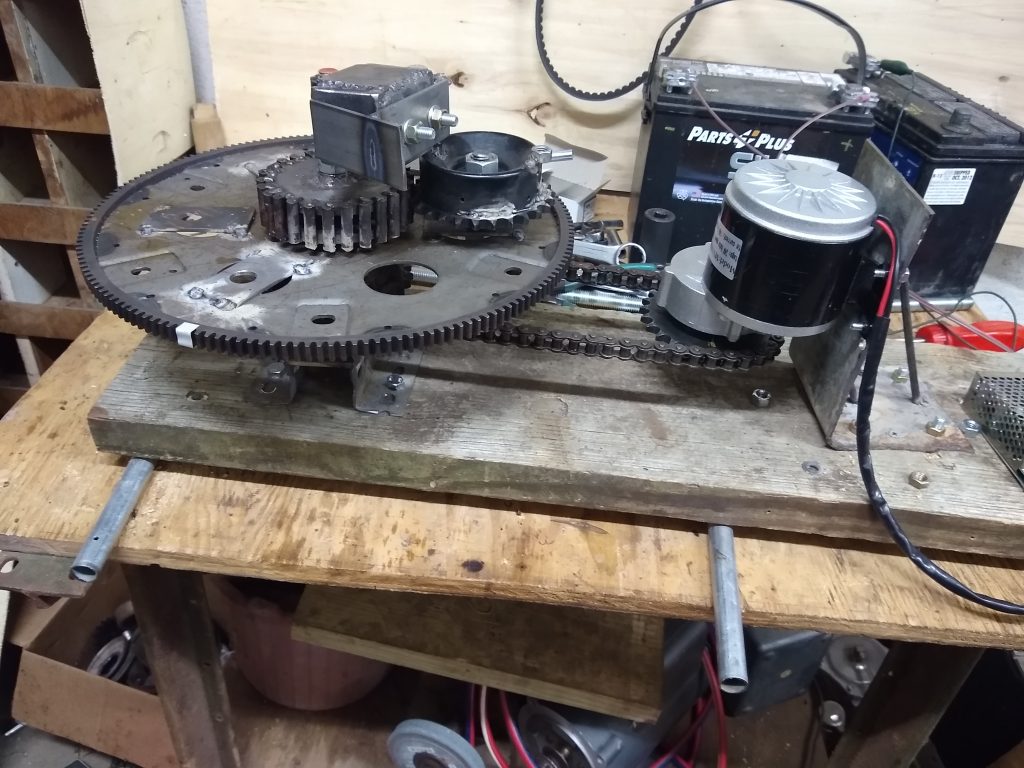
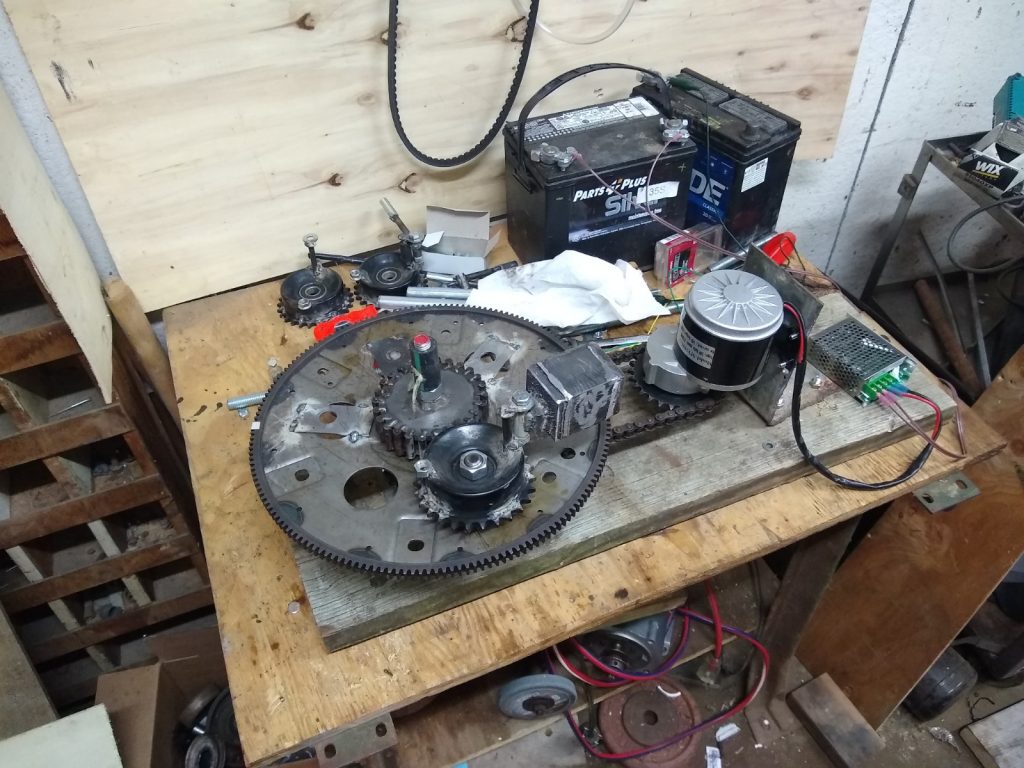
Starting the PIE 4.7 Second Wheel

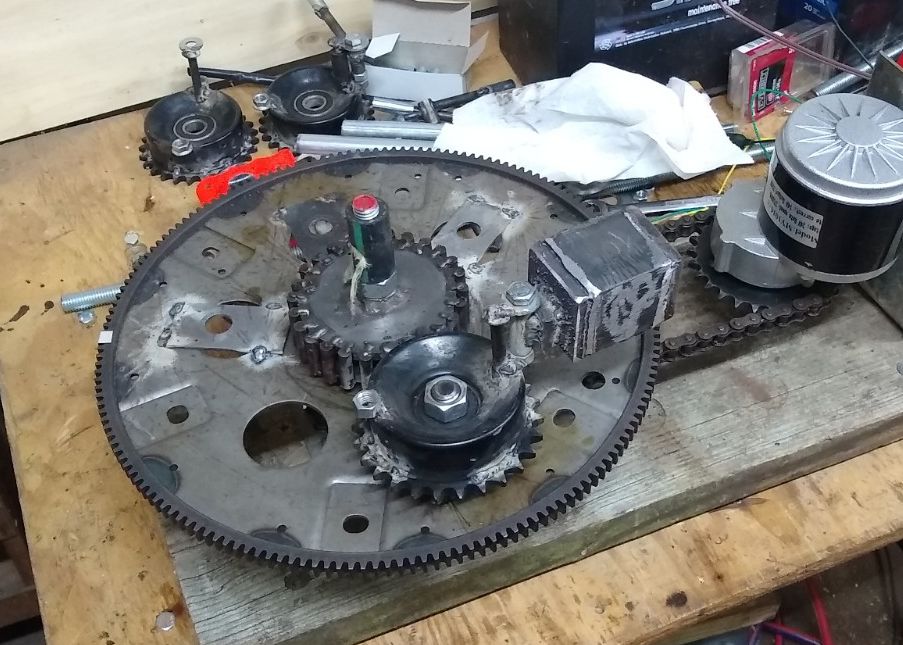
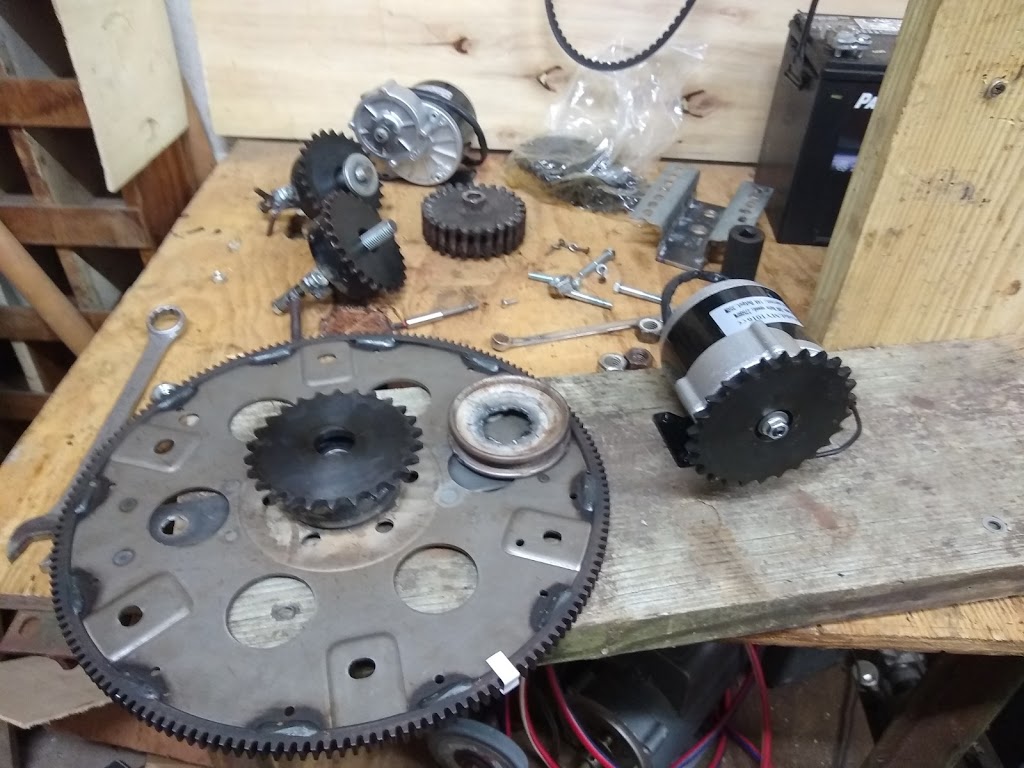
I am now actively building more weights and components for the counter rotating wheel assembly. As we have seen before, the PIE design works better with two wheels but this is the first one that has “self-propelled) with just one wheel. I think it will be very interesting to see it work with a second wheel, especially a counter rotating one.

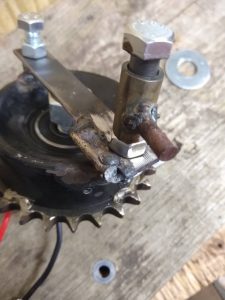
If I do decide that I do not want it to counter rotate, the weights can be modified by just grinding the welds for the ramp brackets that I welded to the side of each one. The pivots are being made to work with the stops in either direction. The other pieces that would need changing are really just the actuators for the switches, so it would not be a super big deal.

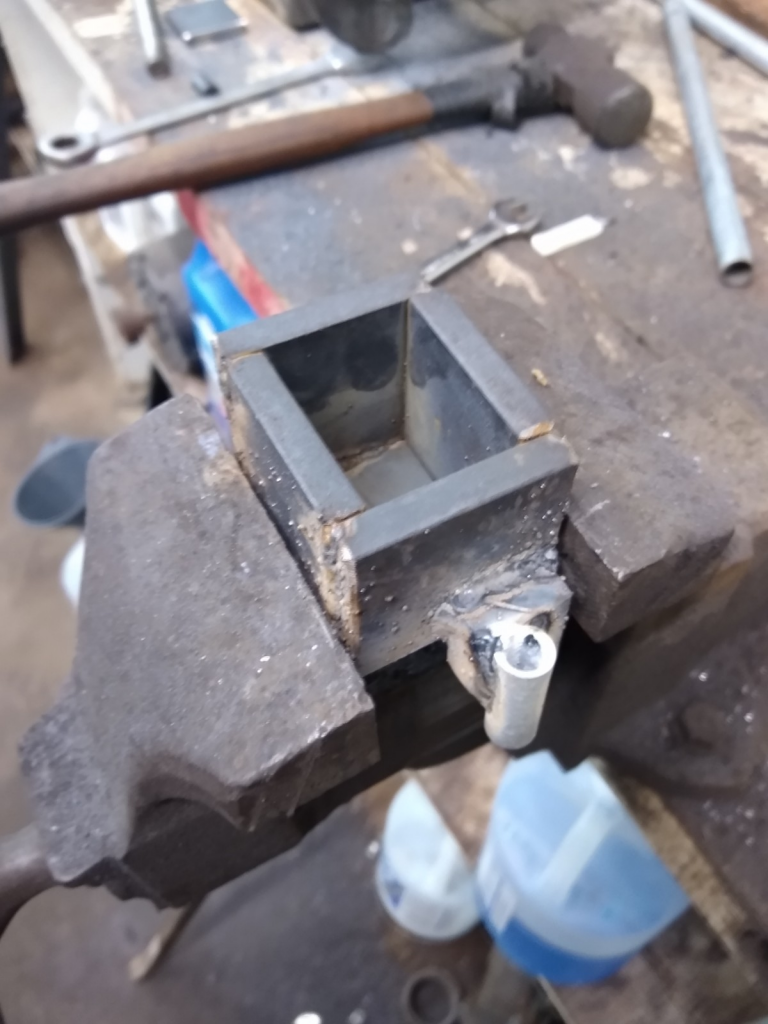
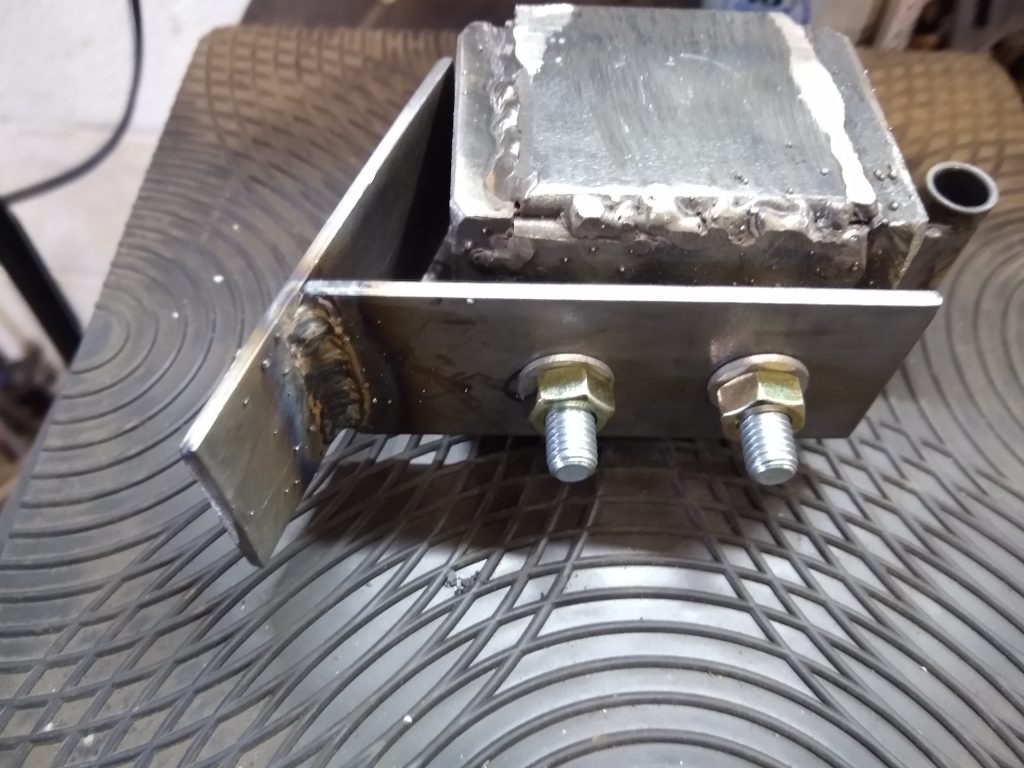
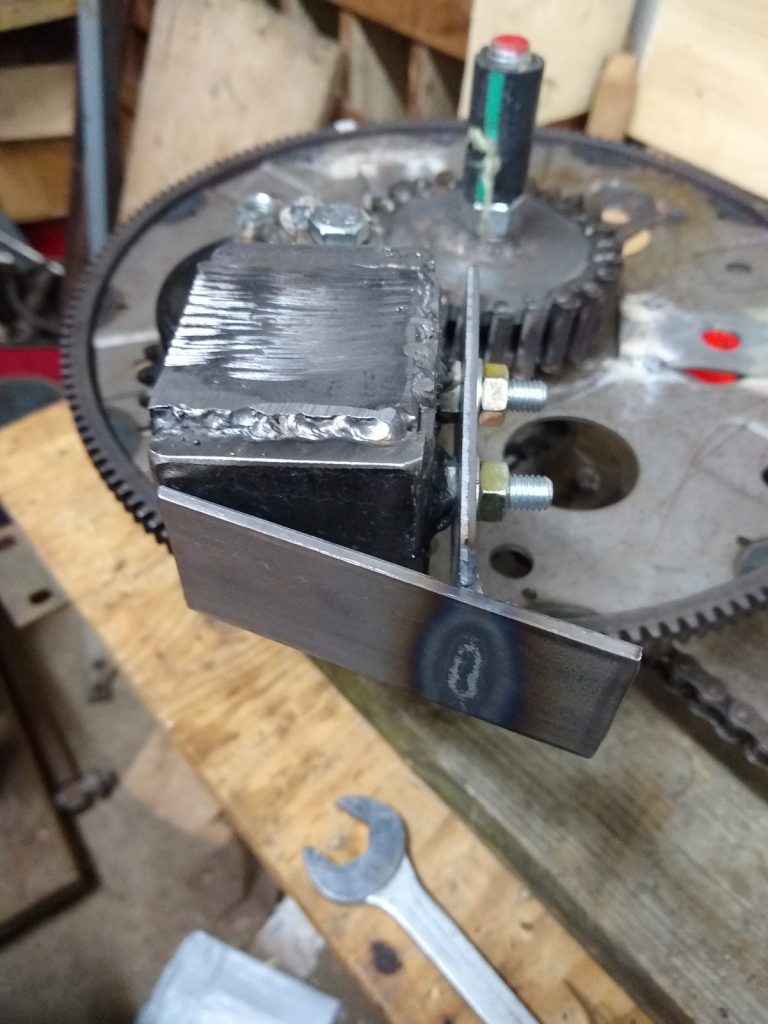
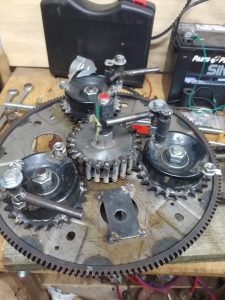
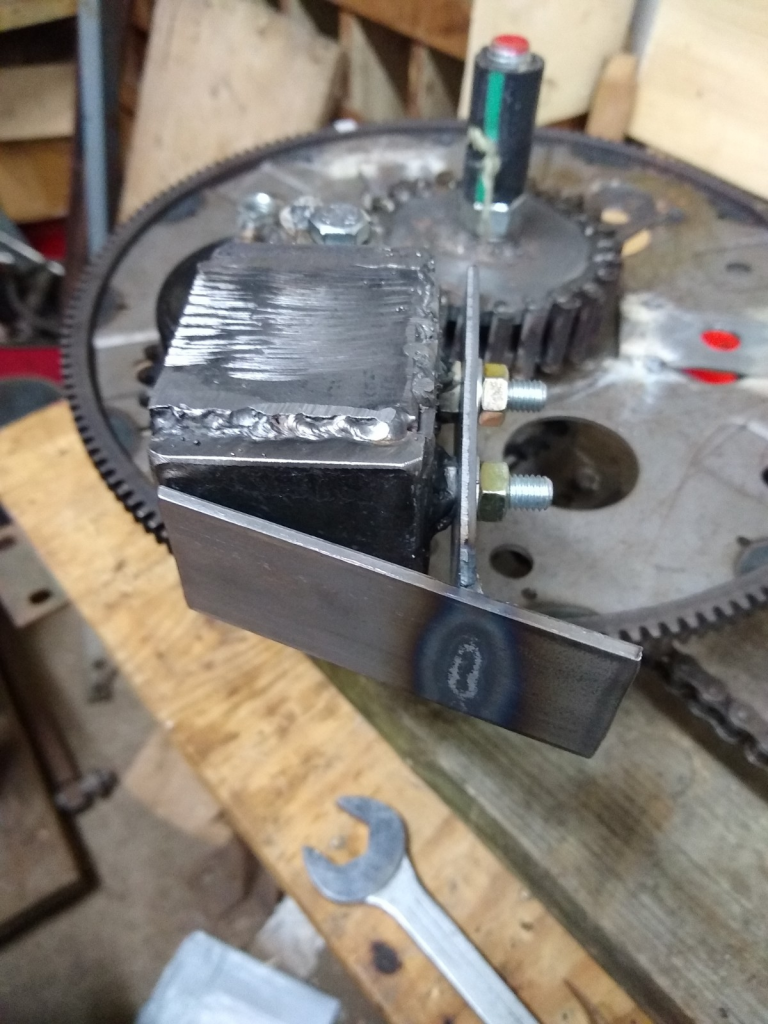
It has been a little while since the first half was built, so I did have to go back and look to make sure the new weights match the original ones in both size and weight. Eight 2X2X3/8″ steel squares, two 1-1/2X3X1/16″ rectangles, a block to hold the pivot bushing and the bushing itself. Once the basic box is made, the BB’s are added to complete the weight measurement and make it a dead blow. I thought they were 2 kg each, but I actually had to weigh one to be absolutely certain! Once the BB’s are added, the top is welded on, and it will need a coat of paint.

The wheel is already constructed, as is the sun gear, so some of the most time-consuming work is already done.

I will update the blog here, as it all progresses.

PIE 4.7 Project Continues!

It has been a while since my last update. I guess I kind of went down a bit of a rabbit hole looking for answers to the reversion issues that virtually all inertial drives have. The answers I found are useful, and everything learned has value!

My search took me through the world of compound levers, offset drives and finally to the Tolchin/Shipov drive. The T/S drive taught me the most as it uses some of the same principals necessary in virtually ALL inertial drives, which is adding the 4th “D” (Dimension) to a gyroscopic arrangement.

4D Gyroscopes: Everyone (basically) learned about 3D in grade school. Height, depth and width or in machine shop geometric algebra, X, Y and Z axis or dimensions. The 4th D is T, or time. Time in a spinning gyroscope is measured in RPM, or revolutions per minute. Adding the 4th “dimension” to a gyro is done by rapidly and purposefully changing the RPM faster AND slower, generally within a single revolution.

If you were to view a conventional toy-type gyroscope, you will notice a frame surrounding the flywheel and a smooth-rimmed flywheel in the center. Now, use a marker (pencil or crayon is fine) and put one dot on the rim of the flywheel. That is now our reference point. Place the gyroscope so you can see the entire rim of the frame and the rim of the flywheel. Place a mark on the frame at the top and the bottom as you are viewing it (right and left work too) and then using your finger turn the flywheel rapidly from one mark to the next, then slowly from that mark back to the beginning. That is the 4th D!!!

Imagine spinning the flywheel at 1000 RPM but installing a mechanism that will slow it to 800 RPM for one-half of each revolution, returning it to its original velocity for the other half, and you have a 4D gyroscope!

Now replace the dot on the flywheel with a small weight, and spin it fast then slow then fast then slow with every revolution one-half of it is moving fast and one-half moving slower. It might not be exactly what you desire, but there WILL be inertial propulsion derived from that device!

It is not about shuttling weights around; it is all about changing the “time base” by rapidly changing speeds during EVERY revolution! Shuttling weights can be part of that and quite often they are, unfortunately many people believe that the weight shuttling causes propulsion, when in fact it is only a component of the gyroscope that can be time-manipulated into performing propulsive work. This can be accomplished mechanically or electrically, and although those two systems may appear fundamentally different, they are like the difference between a diesel and a gas engine, they may be “fed” fuel differently and the ignition of that fuel is done differently they are still a piston & crankshaft engine (there are also rotary and turbine but I’m not going there right now).

So, keeping in mind that there are different ways of accomplishing the same basic task, I am back to the PIE 4.7 with a renewed outlook and it is definitely time to “Git ‘Er Done”!

Tolchin/Shipov Drives May Compliment PIE System

As the PIE project continues, I am not blind to reality. There are still many shortcomings to be overcome, forces within the PIE assembly which fight themselves and therefore fight against the very purpose of the PIE. “Reversion” is “anti-propulsion” and it is the bane of all inertial propulsion systems, a primary force to be circumvented as it cannot be eliminated. In the quest for circumvention there is a relatively simple sounding answer known as “redirection”. There is a type of device which has purported to have redirected reversion with good efficiency invented by a Russian named Tolchin and redesigned by another named Shipov. Because this Tolchin/Shipov (T/S) design effectively used redirection within a narrow band of geometric proportions, and because the mechanicals of the T/S drive are less complex than that of the PIE, I have allocated a bit of time and resource to verify T/S drive operation. Assuming the device is verified, a small T/S could be used as an anti-reversion device with the PIE and with other strong impulse drives as well.

Tolchin vs. Shipov: The Tolchin drive was originally fully mechanical with a spring motor and mechanical governors and brakes to build forward momentum and then partially nullify reversion. Once Shipov came into the picture the mechanical controls were replaced with electrical controls. I believe either would be effective, but electrical is easier to adjust and modify so that is the route my experimental work is following at this time.

Tolchin Drive
Shipov Drive

Noteworthy Difference: There is one other noteworthy difference! The Tolchin drive appears to have lacked the precision of the Shipov drive. Watching the videos of the Tolchin vs. the Shipov, Tolchin used one moveable mechanism inside another to lessen the reversion. The inside mechanism moved forward and back “pulling” the main trolly with what appear to be rubber bands. The inner mechanism may also be angled downward slightly to use gravity as an integral part of the cycle. Shipov eliminated these considerations with precise braking control of the rotating assembly.  

The Tolchin/Shipov drive cycle explained:

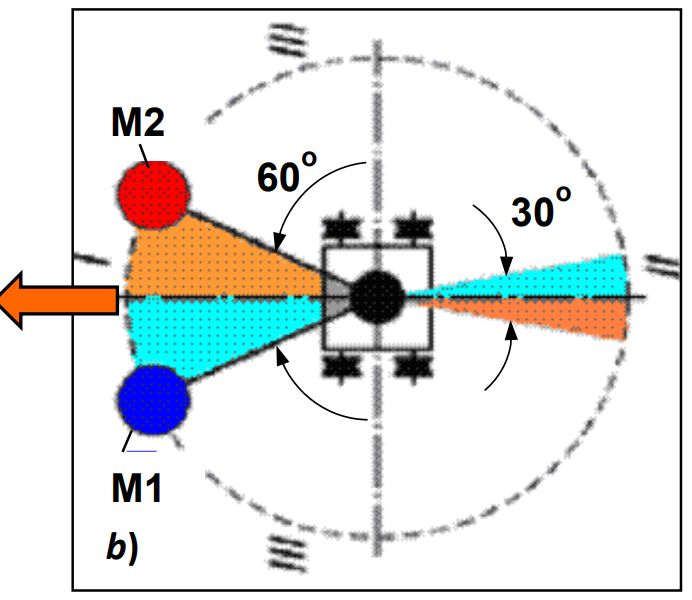
The T/S drive has 2 halves and they are identical mirror images of each other so I will only focus on 1/2 of the drive. I will be using clock positions of the weights for clarity. The rotation in this explanation will be clockwise to follow the numbers and 12 o’clock is straight forward.

1: At 12 the weight is moving at base speed.

2: At 1:30 (60 degrees) the weight is accelerated to approximately 2X to 3X the base speed (power stroke).

3: At 5:30 (30 degrees from center measured at the bottom) the weight returns to base speed.

4: The weight continues at base speed on around to 12 and starts over.

Since the acceleration force is designed to occur within a 90-degree arc (1/4 revolution), the forward thrust needs to be more than the reverse thrust used in returning the weights to the front. This is simple but stopping the acceleration (accelerated speed) at the exact right moment is critical if the T/S drive is to function!

Shipov Drive Cycle

Current: Right now, the gearing is put together and I am currently powering it with an obsolete cordless drill mechanism. Speed control is accomplished with the same controller being used on the PIE 4.7, including the SDC control.

Current T/S Type Drive Experiment

Problem: The problem with my replica is the weight’s return to base speed is not instant, and because the rotation is still moving too fast (and overshoots the desired slow-down position) the centripetal force pulls in the wrong direction. A brake is needed to quickly (instantly if possible) slow the rotation speed back to base speed. I believe this might be accomplished with a “motor brake” working similarly to a modern cordless drill which stops without coasting when the trigger is released. Another thought is that my weights are too heavy for the older model drill motor to effectively decelerate quickly, and they may need to be replaced with lighter weights.

Gyro, Centrifugal, Centripetal? Shipov called this a “4D gyroscope” where the 4th dimension is time (rotation speed), but it could also be called a “centripetal drive” since thrust is derived by accelerating the weights in an arc toward the rear, and then the centripetal energy is absorbed by reducing speed at the moment the direction is perpendicular to desired motion. Since the mirrored half is doing the same thing in the opposite direction, sideways force is cancelled at both the acceleration point and deceleration point.

Changes Brought About Via Single Wheel Testing PIETECH P.16

***Note #1: This post was created before P.15 so the testing spoken of has been completed already. Read PIETECH P.15 for explanation.***

As I approach and prepare for the next set of propulsion tests for the PIE 4.7, want to note the most recent successful design changes made which do increase power output in the early bench tests performed so far. It should be noted that none of these changes require any input power increases.

***Note #2: I also have had another idea, one that seems so preposterous that I am consulting with a few trusted individuals before revealing it.***

The first three of these four are self-explanatory but we shall touch on them very quickly.

It is a definite power output increaser to:

1… hold the weight in center longer (via guides).

Weight With Guide Attached

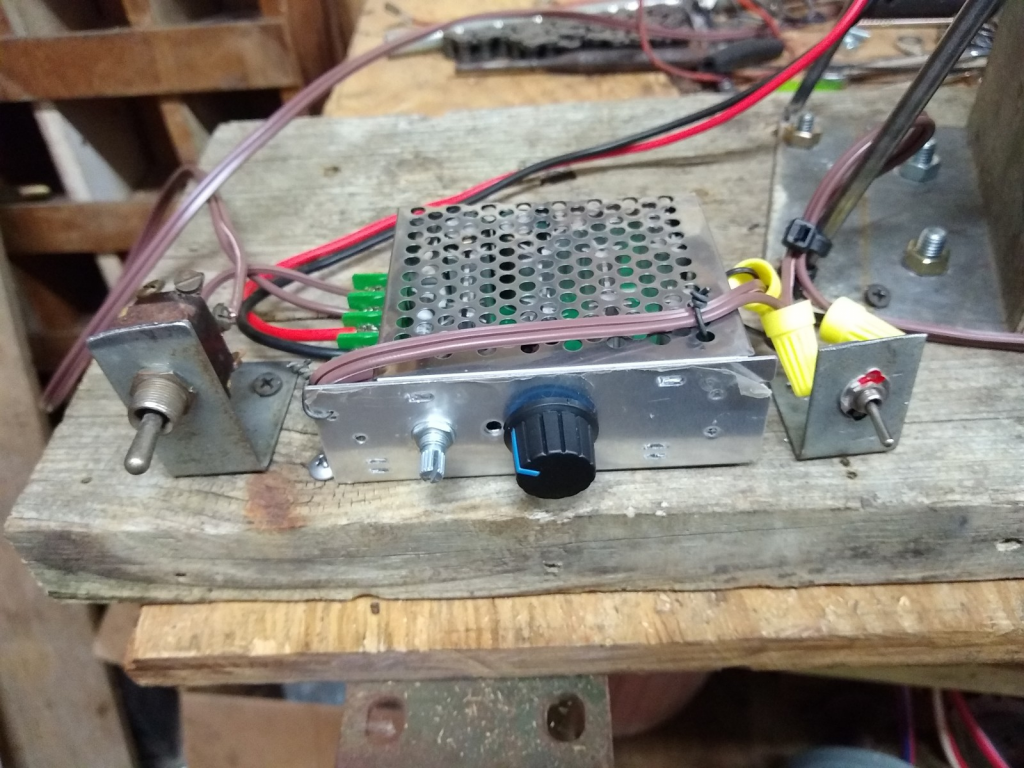
2… to be able to adjust speeds on the fly (via speed controller and SDC gain control).

SDC Controller

3… use dead blow weights (stronger & longer pulses without increasing input energy).

Building a Dead Blow Weight

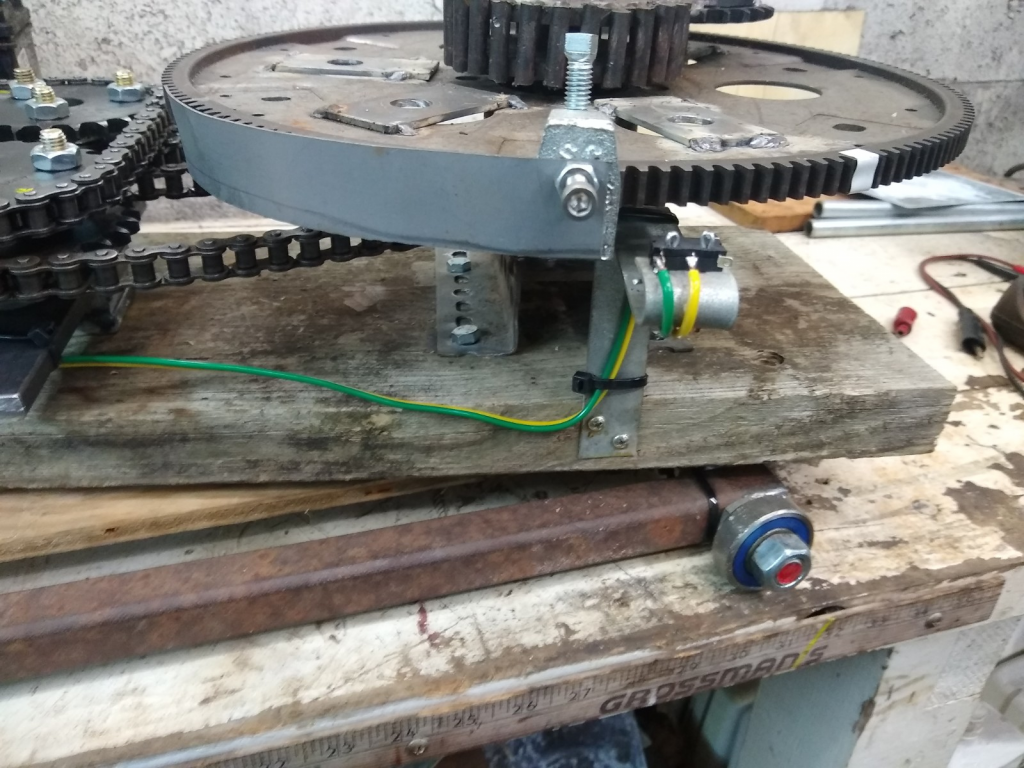
4… use the SDC (counters loading slow-down and increases pulse strength).

SCD Actuator and Micro-Switch

Number 4, the SDC (Speed Differential Control) is a real game-changer, so that is where the focus needs to be for now. Some of the important details & technical notations regarding this are as follows:

1st: The output goes down dramatically if speed is reduced during the “power stroke”. This was discovered when the original belt would slip at times. It stood to reason that if speed decrease was detrimental, an increase could be very beneficial. Mechanical experimentation was performed very successfully by my friend and colleague Tokio using offset (eccentric) gear drives. When he added them to a PIE design (PIE 3.* series) great power was generated, and many components were destroyed by internal forces. Electrically changing speeds is quick and efficient!

2nd: Higher speeds are known to increase power output, but reducing the weight in order to achieve the high speeds was counterproductive. The SDC can momentarily increase the speed higher than necessary to maintain base RPM, simulating a higher speed without adding damaging high loads to the mechanism or increasing input power.

3rd: Adding speed only when required adds to the outward swinging motion of the weight and reducing that speed “could” increase the impact on the outer stop to increase power.

4th: This may me a stretch of my imagination… I believe that the combination of the guide and SDC acts upon the PIE similar to the “Inner Planet Trap” did in the Roy Thornson design. I have to think that instead of speeding up the RPM at the correct moment, Roy was “slowing down” the RPM at the beginning of the power stroke and allowing the RPM to rise in mid-power stroke.

5th: Keeping the electric motor speed low is important as it reduces the overall inertial flywheel effect, allowing faster RPM changes to the PIE’s main wheel (flexplate/flywheel).

Something that can be kept in mind for future experiments would be the utilization of a CNC (think Arduino, maybe) controlled stepper motor and servo system, perhaps with hall effect sensors for feedback, which would virtually eliminate all of the guides, micro switches, gears, and chains. Even the main wheel could just be a straight arm attached to a stepper motor.

Those innovations (if ever used at all) are definitely a long way off in the future, and for now we need to learn to walk before we can learn to run.

PIETECH Page 12, Happy New Year (Thank God 2020 is Over, Let’s Move Forward!!!)

As 2020 comes to a close, I look forward to what 2021 will bring. “Normal” life was suspended, the MSM news cannot seem to find anything to report that doesn’t have a carefully scripted narrative, alternative news sources have come under fire from big tech and the MSM, but those of us quietly building, designing and experimenting found the slow-down to be a productive time.

It has been a strange year but there has been a great deal of progress by “amateur” researchers and experimenters, so I thought it only right to recap some of the more important inertial & gyroscopic propulsion findings of 2020.

From esteemed engineering professionals to a host of virtually unknown tinkerers (me) and from all parts of the world, approaches to building a fully functional inertial drive system are quite varied but the experiments publicly presented have erased all doubt that this is a valid (although infant) technology which will soon be a budding mainstream industry.

Early in 2020, the early evidence presented and posted on video platforms such as YouTube and BitChute was still drawing a LOT of negative attention from some “learned” “experts” who unequivocally argued that all working units are fakes designed to defraud the unlearned public. Most of these demonstrations were genuine, and many of the online attackers were nothing more than “trolls” attempting to keep honest people from discovering anything meaningful. I am not going to speak for the many brilliant people who have designs of their own, I will only mention the work I have done over the last 12+ months.

In 2019, I had finally built a proof of principal gyroscopic design of my own design when I happened upon the work of Roy Thornson. I saw his design as a highly workable and developable device that should be replicated and improved. So I shelved (but kept intact) my initial work and switched to the Thornson design. I downloaded everything I could find, bought every available technical reference, and eventually even contacted someone who knew Roy personally. Within a month or two, I had a Thornson based replica that could self-propel across a workbench and I was “hooked”.

I decided that because I had built a working model that could easily “go missing”, the safest way to keep both it and me safe was to make every step public, free, and open source. So all the building steps were posted to a blog (this blog) and the machinery itself video recorded and publicly released. I hope that my work can help someone else with their journey.

The things I learned and overcame regarding inertial propulsion are all posted publicly, but here is a recap (I’m sure there are things I missed):

How to make steel spur gears, cheap enough to be disposable.

How to attach automotive flexplates to bearings for the main wheels.

How to make different types of swinging weights.

How important the inner stop is, it does not work without it!

How to make the outer stop a part of the planet gear.

How a slipping belt can cause it to stop thrusting (chains are better).

How different configurations of gears affect performance.

How different timing affects performance and is different for hybrid use.

How a dead blow weight design enhances performance.

How performance is affected by counter rotating wheels.

How to effectively use as a hybrid “helper” drive.

How to make better steel gears.

How to select the correct drive motor.

How to write a manual.

How to build a website.

How to ignore (and delete) negative comments.

How important it is to have friends who understand inertial propulsion (thanks Tokio).

How an eccentric gear design can enhance performance.

How important it is to listen to and commune with my God.

I also learned a whole lot about what does NOT work!!!

There are probably more items to add… Read the blog & watch the videos for details including some failed tests, early tests, designs that work, and designs that don’t.

I already have 2 design changes in mind for the first part of 2021, it should be exciting! I hope others get busy building too! I also hope everyone stays safe. Happy New Year!
First Propulsion Bench Test for PIE 4.6

I had intended to wait and do the first true propulsion test on the 4.6 on a proper set of bearings or wheels, but I found myself with a few minutes of free time so I went into my lab area to think about “next moves” & decided that I simply wanted to see it move on its own.

So, it was nothing fancy and the battery was not “riding” along with it. No numerical data was recorded either. I simply placed two short (about 12”) lengths of ½” (12mm) conduit under the PIE 4.6 which would allow it to move freely forward and backward.

PIE 4.6 First Propulsion Test

The RPMs were slowly brought up from zero and as soon as the weight started to swing properly the PIE 4.6 moved forward only, and with a great deal of authority. I was VERY pleased, and I was truly amazed at the lack of backward movement which I am attributing to the dead blow design. I will be posting a video very soon (might be posted by the time this is being read) so please check my YouTube & BitChute channels. https://www.youtube.com/user/stclairtechrd  and https://www.bitchute.com/channel/miGkQfBM24NZ/

I will be making a couple more of these amazing Dead Blow Weights with its attached Guide (DB-G) as soon as possible so that I can see if the 4.6 will still move properly with multiple planet gears using the DB-G. From there, multiple wheels would be on the agenda along with experimentation much like those performed with the 1.0 and 2.0 such as synchronous rotation vs. counter-synchronous rotation etcetera.

It has been mentioned that the slow progress and multiple videos posted with little success tend to be frustrating. This is the methodology employed by the scientific community and by professional Model Makers worldwide.  Even though I know what I want to build, taking these slow and methodical steps allow me to eliminate component designs with inferior performance and focus on those designs with more promise. The more successful designs, to which I am adding the PIE 4.6, are the fruit of this painfully slow methodology. Regardless of anyone else’s personal beliefs (all are welcome to their own beliefs) I also acknowledge a divine inspiration fueling my own personal path of growth in this lifetime.

PIETECH Page 9 – PIE 4.5 With New Dead Blow Type Weight

The latest test of the PIE 4.5 is using a 1 kg dead blow type weight. The weight is a steel box with steel shot (BB’s) inside it. It appears to have a lot of promise, as there is virtually no “bounce” when the weight hits the inner stop, and it seems to be dampened where it would contact the outer stop if it had one (has not been installed).

PIE 4.5 with Dead Blow
Dead Blow Weight Installed On PIE 4.5

There is a video of this first testing on YouTube and BitChute. The problem however remained that the centrifugal force and impact force did not push in the same direction, which was the reason for Thornson’s “Inner Planet Trap” which would hold the weight and release at the correct time.

The answer is to install a “guide” on the end of the weight which would keep the weight near the center axle and correct the problem of thrusting in two different directions. This is proving , so far, to be a much improved design. This can also be seen on YouTube and BitChute.

Guide Fastened to Dead Blow Weight

These improvements are now bringing the PIE version up to “PIE 4.6”.

PIE 4.6 – Dead Blow Weight and Guide

Check out the videos on YouTube and BitChute & thanks for watching!

https://www.youtube.com/user/stclairtechrd

https://www.bitchute.com/channel/miGkQfBM24NZ/

PIETECH P.6 – Web Site Active, Manual is Ready, 3-planet System Testing, & Possible Changes to the Weights

The Web Site

 The web site is officially up and running! I am definitely not a web page builder, but thanks to some awesome open source software (Open Element) and a very cost effective web hosting company (https://www.hostens.com) who also offer a suite of programs free with the service, www.stclairtech.tech is live.

Eventually this blog may migrate to the www.stclairtech.tech site.

The Manual

The PIE BUILDER’S MANUAL is complete as well and there are links to it from the stclairtech web site. I have listed it on eBay either as a downloadable PDF formatted e-book or as a paper manual. The paper manual also includes the downloadable version and they both come with links to exclusive manual “companion videos”.

The PIE 4.3

The PIE 4.3 has the new motor installed, and the RPMs are just where I expected them to be. The 24v motor is very strong and seems to do a great job of maintaining a stable speed under load. I thought I was ready to build the second wheel, but building the web site gave me some time to think. There are some modifications and variations I want to explore and experiment with as the building continues.

1st I definitely want to try an odd number of planet gears. One gear works better than tow, so I need to see if that is going to continue to change results as the number of gears increases.

2nd I want to add an electrical circuit to the drive motor that can instantly vary the speed it runs. Since I know that if it is allowed to slow when the weight is leaving the center and accelerating in velocity (power stroke) the thrust is dramatically reduced, it stands to reason that inverting this RPM drop into an RPM increase may lead to better results. This could be somewhat accomplished with matching offset drive sprockets, but I think that faster translations between speeds may be more effective….

3rd I want to increase the efficiency of the weights… But how? The answer to this may have already been answered more than 85 years ago by Mr. Harry W. Bull of Syracuse, NY with a device he called the “Propulsor”. This led to an OMG moment…

OMG Moment:

The H.W. Bull “Propulsor”:

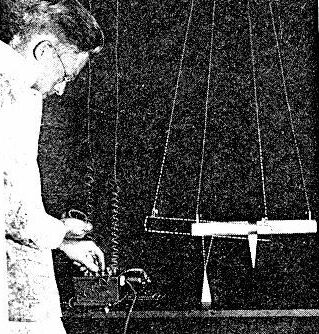
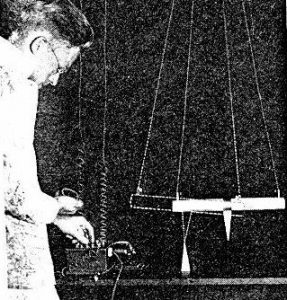
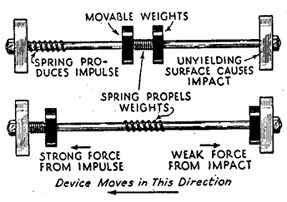
In January of 1935 Harry W. Bull of Syracuse NY was featured in a Popular Science article for his invention known as a “Reaction Motor” which came to be known as the “Propulsor”. This design uses 2 equal weights that are slammed into opposite ends of a tube, one weight hits a solid stop while the other hits a “spring” stop. This creates a differential in the efficiency of the “stopping” of the weights. The solid hit creates sound and heat as waste energies while the “spring” end transmits the directional force more efficiently. Like the difference between a steel and a “dead-blow” hammer.

An interesting chapter in the professional life of Harry Bull is available online at http://epizodsspace.airbase.ru/bibl/inostr-yazyki/iaa/1989/Winter_Harry_Bull_American_Rocket_Pioneer.pdf  . On pages 308 & 309 of this volume of a much larger book, the propulsor is briefly discussed.

Of course, Mr. Bull’s work with the Propulsor was immediately rebuffed  by the “scholars” of the time and was publicly denounced as a “fallacious” in 1947, just as all other attempts at a reactionless drive have been and still are today.

Harry W. Bull Pendulum Testing

Basic Principal of Propulsor
 

Back to PIE 4.3

What if the PIE’s weights were “dead-blow”? Since a dead-blow hammer effectively transmits more force in every blow than a plain hammer because it has almost no “bounce-back”, I think that a similar design could be used for the weights which would then transmit their power more effectively with less wasted energy. The reason it transmits power more efficiently is because it lengthens the TIME the contact blow happens! Time, the length of time that virtually any impulse drive uses to produce directional force is a critical feature in successful operation!

3-Planet System

Current Work

Currently the PIE 4.3 has the option of 2 or 3 planet gears. The 3-gear design just makes sense to me, but testing will tell the story there. There is a motor speed controller currently ordered and I am building more weights to experiment with. 

I have just begun testing the 3-planet set-up and I will post more as I go, but there is a video of an initial test run available on YouTube and BitChute (links below).

YouTube: https://www.youtube.com/watch?v=ii1l8W9-8nQ

BitChute: https://www.bitchute.com/video/5pmnbyhLKRcJ/

PIETECH P. 5 – Upcoming Manual, Website, and Continuing the PIE 4.3


I apologize for the time lag since my last posting, life tends to get in its own way sometimes but we all do what we have to do. 

Website & Manual: I am building a website for my little consulting firm focusing on the R&D side as well as the PIETECH manual (basically complete, getting finishing touches now). There will also be access to companion videos. That access will only be available with the purchase of a manual. The address to the website is http://www.stclairtech.techit is online now but I hope to have it truly functional in the next 3 weeks.

At this point in time, the manual (and its companion videos) will be the only information that is not completely free. This will hopefully help offset some of those constantly inflating costs.

A Kit?: Another possibility which came to me as a suggestion is that of a functioning miniature model kit. The kit may be a partially assembled, or only contain the finished pieces. That idea is still only on the drawing board for now until the logistics can be fully worked out.

PIE 4.3 Current Progress: I have taken the PIE 4.3 apart to replace the drive pulley with a chain sprocket. This has given me the opportunity to analyze the unit looking for weaknesses and damage.

Disassembled PIE 4.3

Broken Outer Stop

Broken Outer Stop

It is very apparent that the outer stops were the first weak point, and once they would break there was a cascade effect of failures. The weight would, at times, be allowed to collide end first into the inner stop (sun gear axle). This caused enough deflection in the wheel and axle that the planet gear could skip a few teeth and become “out of time” with the assembly. Now that the 4.3 is apart I have found that the wheel is slightly bent (about 3mm or 1/8”) which is not enough to need replacing yet. The axle is also bent, and that is now definitely scrap metal, There are vides posted to YouTube and BitChute describing the process and showing the bent axle. 

YouTube: https://youtu.be/wmoc2-1v43A 

BitChute: https://www.bitchute.com/video/rfK5qGGRDffR/

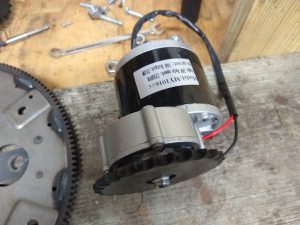
I have also received 2 new gear-motors for the PIE 4.3 which are all set up to run at approximately 300 RPMs at 24 volts DC. I am seriously considering running 2 wheels, each with their own drive motor. That may be overkill, but right now design simplicity is very important for the purpose of easy transitioning into the testing phase. 

New Motor

It is reasonably simple to set up a chain drive that would spin the wheels in opposite directions (obviously planning opposing wheels) and they would obviously always be in-sync with each other, but there are other testing considerations like running wheels at different speeds and easily being able to reverse either wheel’s rotation.

PIETECH P.4, Coming Soon, a PITECH Builders’ Manual, Also Continuing the PIE 4.3’s Progress


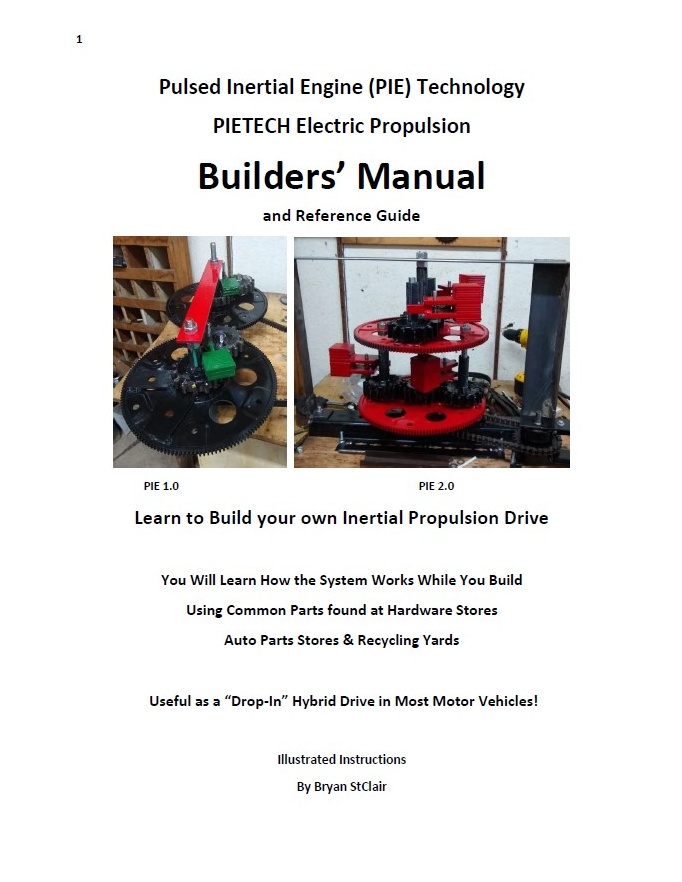
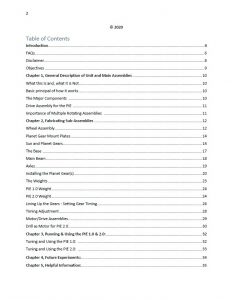
PIETECH Manual: There has been a “Manual” in the works for a while now. It is coming together well and once it is completed it should be a valuable resource for anyone wanting to experiment with Inertial Propulsion without spending untold hours with trial and error testing and expensive components that may not be exactly what is necessary. I have several reasonably complete drafts sent out to other people familiar with this technology for their opinions and criticism. Below is a preview shot of the Cover and the Table of Contents as it is right now.

I am hoping to have this available before the end of the year!

PIETECH Manual Cover

There is also a section within the manual that explains the mechanisms which create the driving force in greater detail than has ever been published, to the best of my knowledge. Color photos and detailed instructions means that little or no math is necessary to follow along, build a working PIE 1.0 or 2.0, and gain a better understanding of the inertial propulsion principals proven to work via the PIE.

  
PIETECH Manual TOC 


Continuing on with the PIE 4.3: Now I am preparing to expand the PIE 4.3 into a 2-wheeled unit running in the 200 to 300 RPM range. Tests have proven the possibility of running RPMs in the 850 to 1000 range, but the components would need a pretty severe redesign in order to sustain those RPMs for more than a minute or two, so I am planning on staying under 500 RPMs for now.

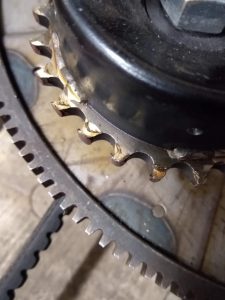
Component Failure: The damage from running at full speed (around 875 RPM) is significant. Both outer stops were broken (twice each), and the sprocket gears used as the planet gears have many bent teeth.

Much of that damage was incurred when the outer stop(s) broke and the weight could jam the assembly. That is also when timing would jump.

“Overspeed” Gear Damage

Possible Gear Changes: Notably the sun gear is completely undamaged! Since there is no damage there and considering the severe pounding the gears in the PIE 2.0 suffered with only minor issues (spot welds breaking), I am reluctant to purchase expensive spur gears which will absolutely have weaker teeth than my homemade ones. Better welding, and perhaps a coating should make perfectly acceptable gears that will stand the abuse of slinging the PIE’s weights.

Sprockets for Now: I will probably continue to use the sprockets as planet gears for now, but if they continue having damage issues they will need improvements to minimize the problem.

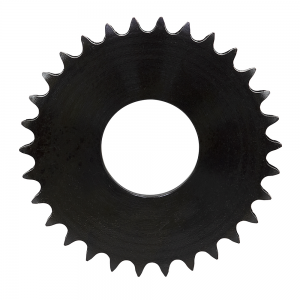
The sprockets I am using in the PIE 4.3, they are 40A26 sprockets with a 1” center hole. When I weld in the rods, I could skip every other space and that would make 13 tooth gears that would be much stronger and mesh with better precision than just welding rods to a flat pulley.

Those sprockets are very inexpensive from https://www.surpluscenter.com (around $3 US each at this time) and they are easily welded.

40A26 Hubless Sprocket

Adding to the PIE 4.3: I now know for a fact that the PIE 4.3 produces 20 oz. of thrust at 275 RPMs, and it runs smoothly at that speed. A second wheel is being added, and it will need to be timed to the first wheel, so a chain drive is being planned out for the drive. I would ideally be able to test with both synchronized “sympathetic” spin wheels and also test with synchronized but “opposing” spin wheels and switch directions as easily as rerouting the chain and having a second set of weights. Time will tell how that works out.

Wheel Configuration: It is VERY tempting to stack the wheels up for this higher speed unit, like the PIE 2.0, but I think it should be a side-by-side to make the switching of directions as simple as possible. I suppose the question should be regarding the placement of the second wheel. Beside the 1st one or in front of it? Perhaps that is something else that should be “changeable” for experimentation purposes as well…

MORE TO COME SOON