Revisiting and Updating the PIE 2.0 into a PIE 2.1, PIETECH P. 14

Because the PIE 2.0 was shelved without any disassembly and was kept in-tact from its last tests and demos, I decided it would be interesting to install the 24-volt electric motor and speed controller on it. It was really great to see the PIE 2.0 spring to life with a renewed vigor thanks to the powerful motor. But this was not the reason for upgrading the version number…

Motor Swapped on the PIE 2.0

Since the motor and speed controller was working so well (on 12v) it seemed natural to add the speed differential control (SDC) to it as well. I started with one actuator, so the PIE would get a speed boost for one half of the rotation which uses two weight pulses per revolution. This would tell me immediately several things. It would indicate if the SDC would be effective on another PIE (repeatability test) and if it would still work with an opposing weight approaching and entering the “neutral/reset” position.

SDC Installed – The PIE 2.1 is Born

Both results were 100% conclusive that the result was a definite increase in power output!

Next was to add a second actuator so the boost would be working with each half of the rotation. A second actuator of identical length (8 inches long) was installed 180 degrees away from the first actuator. Power output seemed very high but because I don’t have a force meter, I simply was not certain. The simple answer was to add a toggle switch in line with the SDC circuit to simply turn the SDC on or off while running the PIE.

PIE 2.1 – With Dual Activators

Results of the dual actuator test was amazing! The base speed could be run from 0 to over 100 RPMs, and the action was the same as it was when running on the drill motor. At different speeds ranging from approximately 30 to 100 RPMs, the differential circuit was activated and deactivated at many different base speeds with very powerful results. Judging only by the amount the PIE was moving the bench I would estimate an approximate 50-75% power increase with the SDC active! THIS is the reason I am calling for the version increase from 2.0 to 2.1 on the older PIE.

As a side-note, the PIE 2.1 runs “smoother” with the SDC, and will probably last longer too!

It is now time to “ramp up” the experimental PIE 4.7 with a second weight, and maybe increasing the mass of the weight(s) to around 2kg. In order to do this mass increase, each weight will be using slightly more than 16 linear inches of 3/8”X2” steel along with the BBs, bushing, bolts and weight mounted guide.

New Dead Blow Weight In Process – Empty Cavity To Be Partially Filled With Steel Shot

As the PIE becomes more “refined”, the total monetary cost of each build increases along with the increase in output power, but when overall quality increases the cost will invariably increase as well.

Videos of the PIE 2.0 changing into a version 2.1 are available on my YouTube channel now, and will also be on BitChute very soon.

PIETECH Page 13, PIE 4.6 Is Now PIE 4.7 With Addition Of A “DSC”

The integration of an external control circuit known as “Differential Speed Control” (or DSC) on the PIE 4.6 is such an important component that the PIE revision level is now PIE 4.7!

Micro Switch and Actuator for DSC

This latest test design is a “Differential Speed Control” (DSC) circuit added to the DC speed controller and actuated by a micro switch. When the micro switch is actuated via an adjustable cam the motor speed increases by an adjustable amount. The amount of increase is adjusted using a potentiometer (“pot”) using just 2 connections, effectively making it a rheostat or adjustable resistor. The pot and switch are in parallel with the adjustable pot on the motor speed controller, and simply lower the resistance in the control circuit of the motor controller.

Because the dc motor has more than enough power necessary to run the PIE, the speed change is nearly instant. The difference between the set speed and the higher speed is the “differential”, and this differential is acting in concert with the planetary gear set to effectively put more control over the weight’s velocity. It is the change of the weight’s velocity (including the changes when contacting the stops) which is responsible for the PIE’s propulsion!

I took a completely hand-held video (no tripod) of the new circuit in operation and it is now posted to YouTube and BitChute, the next video will be using the tripod.

The video can be seen here:

PIETECH Page 12, Happy New Year (Thank God 2020 is Over, Let’s Move Forward!!!)

As 2020 comes to a close, I look forward to what 2021 will bring. “Normal” life was suspended, the MSM news cannot seem to find anything to report that doesn’t have a carefully scripted narrative, alternative news sources have come under fire from big tech and the MSM, but those of us quietly building, designing and experimenting found the slow-down to be a productive time.

It has been a strange year but there has been a great deal of progress by “amateur” researchers and experimenters, so I thought it only right to recap some of the more important inertial & gyroscopic propulsion findings of 2020.

From esteemed engineering professionals to a host of virtually unknown tinkerers (me) and from all parts of the world, approaches to building a fully functional inertial drive system are quite varied but the experiments publicly presented have erased all doubt that this is a valid (although infant) technology which will soon be a budding mainstream industry.

Early in 2020, the early evidence presented and posted on video platforms such as YouTube and BitChute was still drawing a LOT of negative attention from some “learned” “experts” who unequivocally argued that all working units are fakes designed to defraud the unlearned public. Most of these demonstrations were genuine, and many of the online attackers were nothing more than “trolls” attempting to keep honest people from discovering anything meaningful. I am not going to speak for the many brilliant people who have designs of their own, I will only mention the work I have done over the last 12+ months.

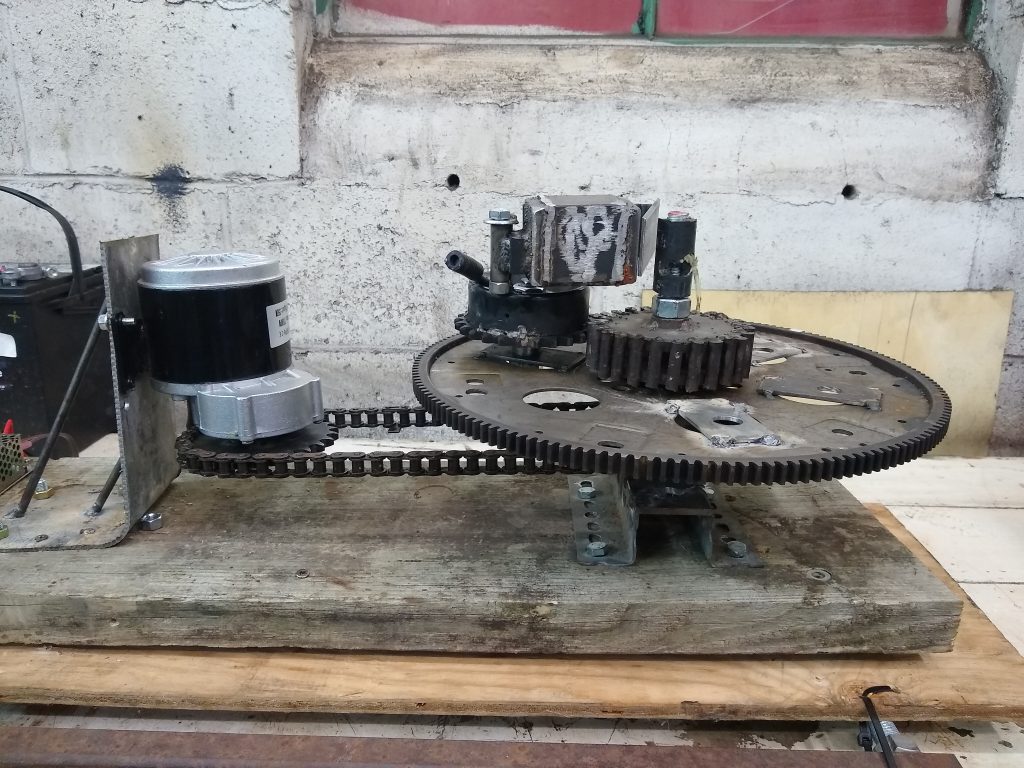
In 2019, I had finally built a proof of principal gyroscopic design of my own design when I happened upon the work of Roy Thornson. I saw his design as a highly workable and developable device that should be replicated and improved. So I shelved (but kept intact) my initial work and switched to the Thornson design. I downloaded everything I could find, bought every available technical reference, and eventually even contacted someone who knew Roy personally. Within a month or two, I had a Thornson based replica that could self-propel across a workbench and I was “hooked”.

I decided that because I had built a working model that could easily “go missing”, the safest way to keep both it and me safe was to make every step public, free, and open source. So all the building steps were posted to a blog (this blog) and the machinery itself video recorded and publicly released. I hope that my work can help someone else with their journey.

The things I learned and overcame regarding inertial propulsion are all posted publicly, but here is a recap (I’m sure there are things I missed):

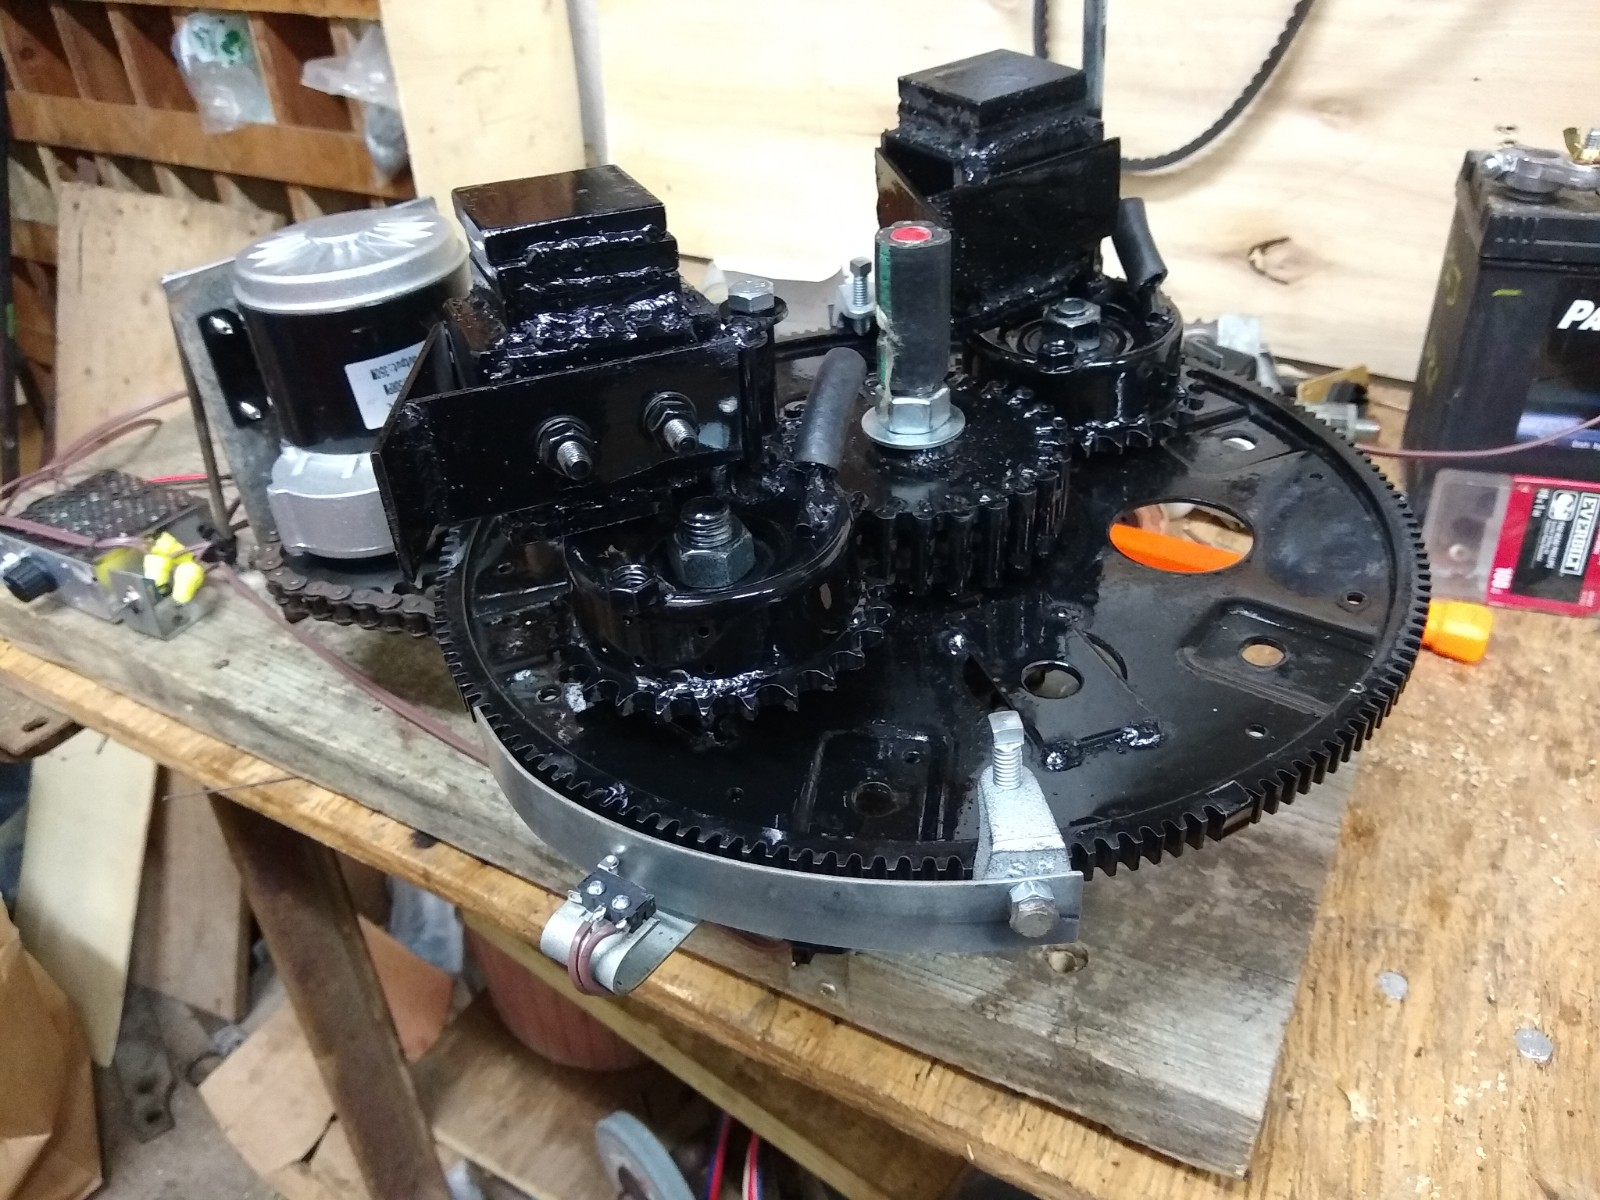
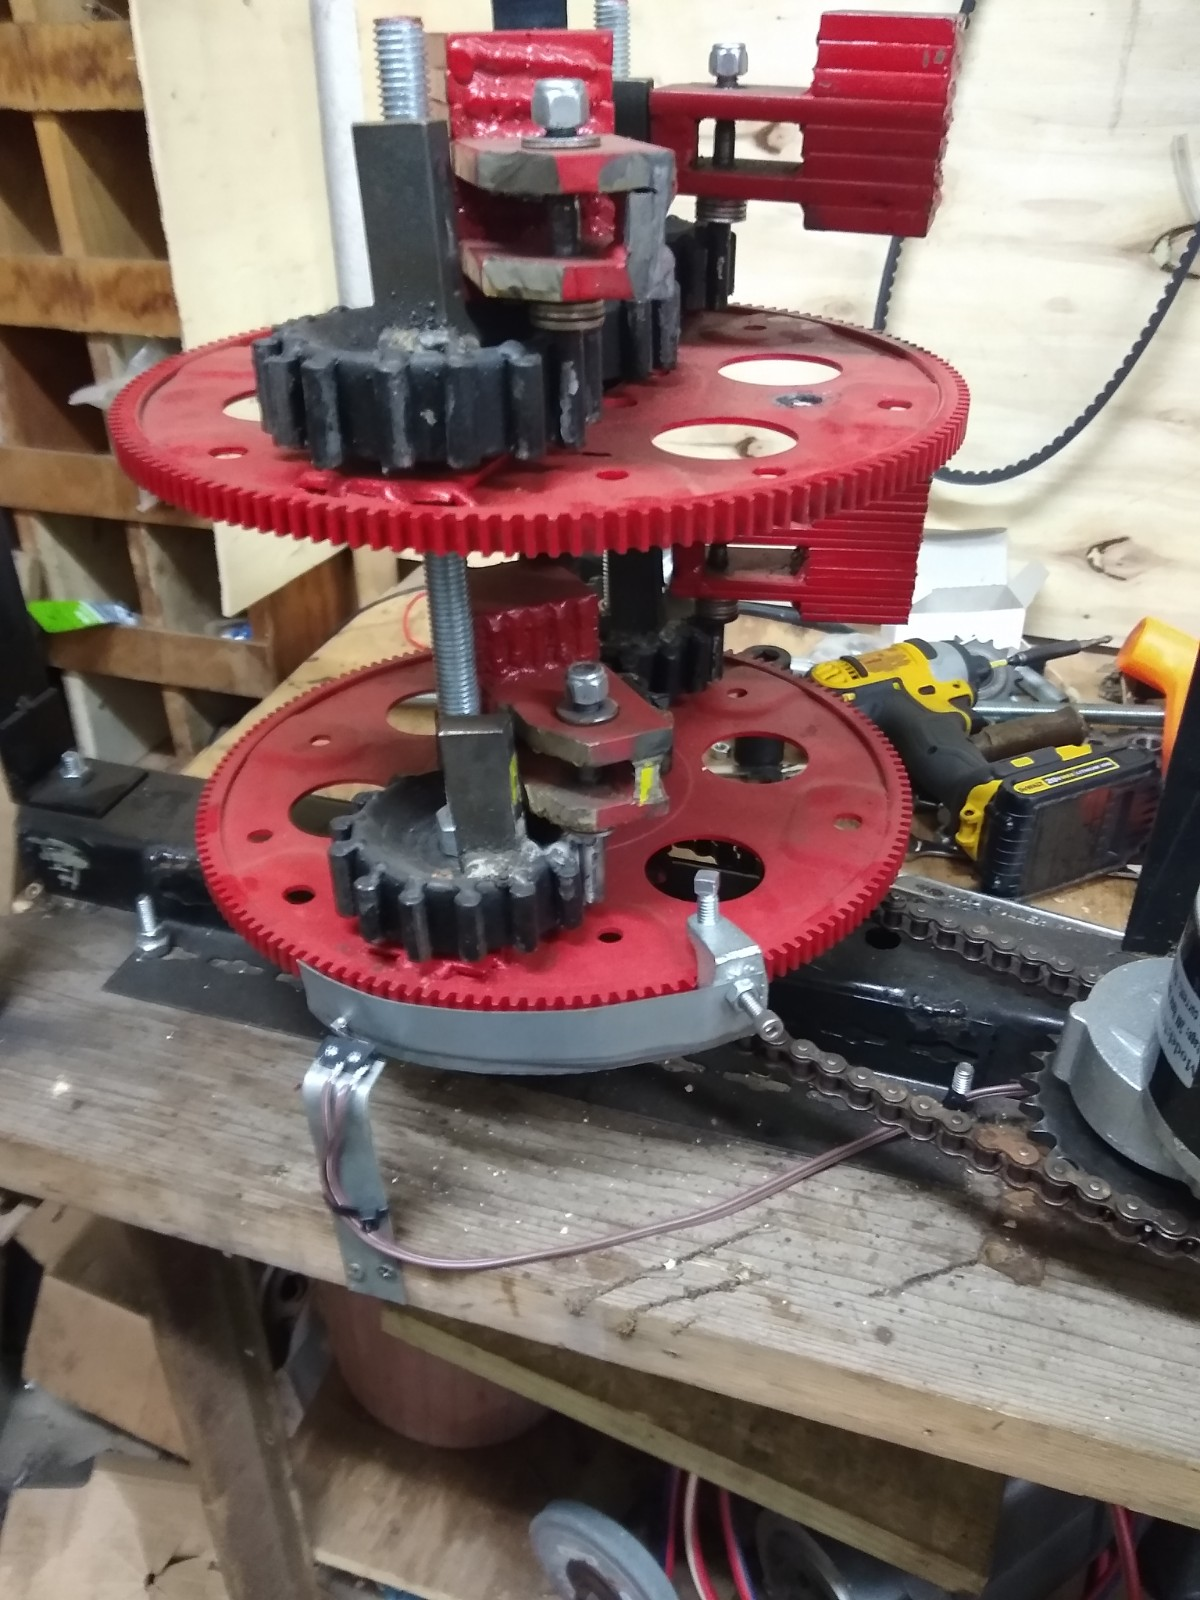
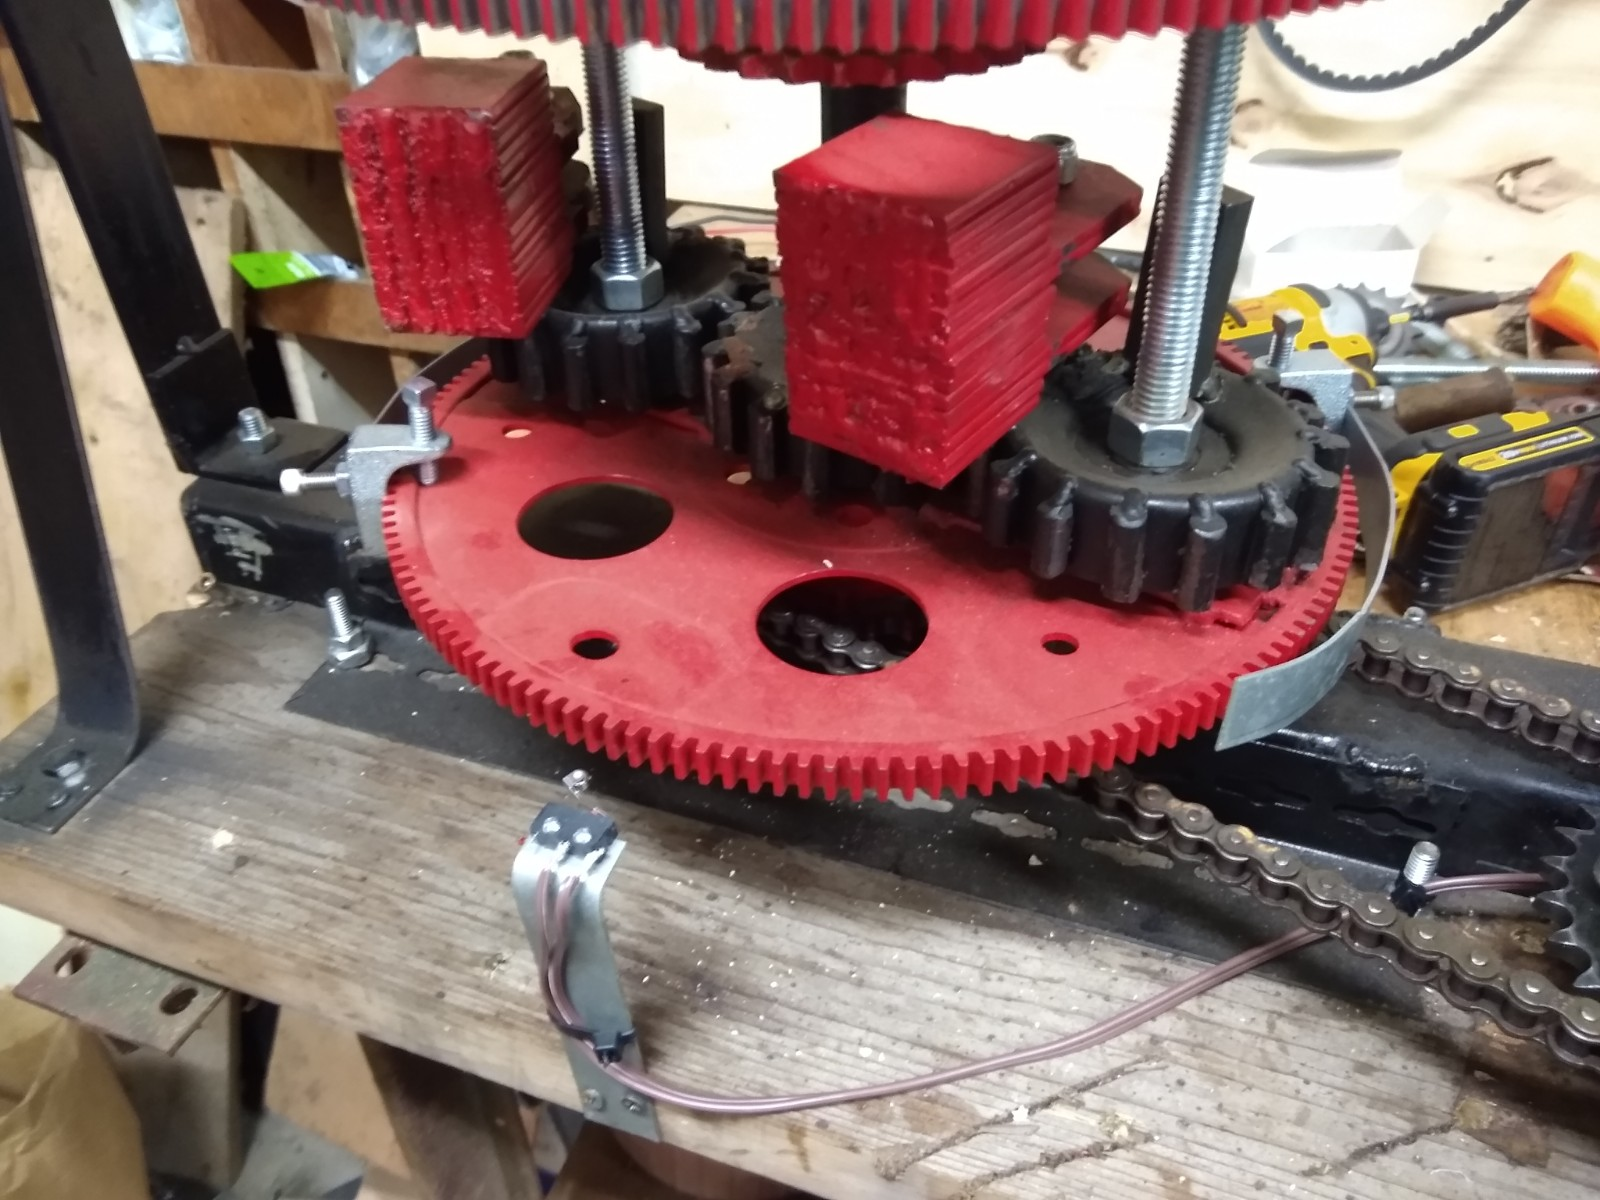
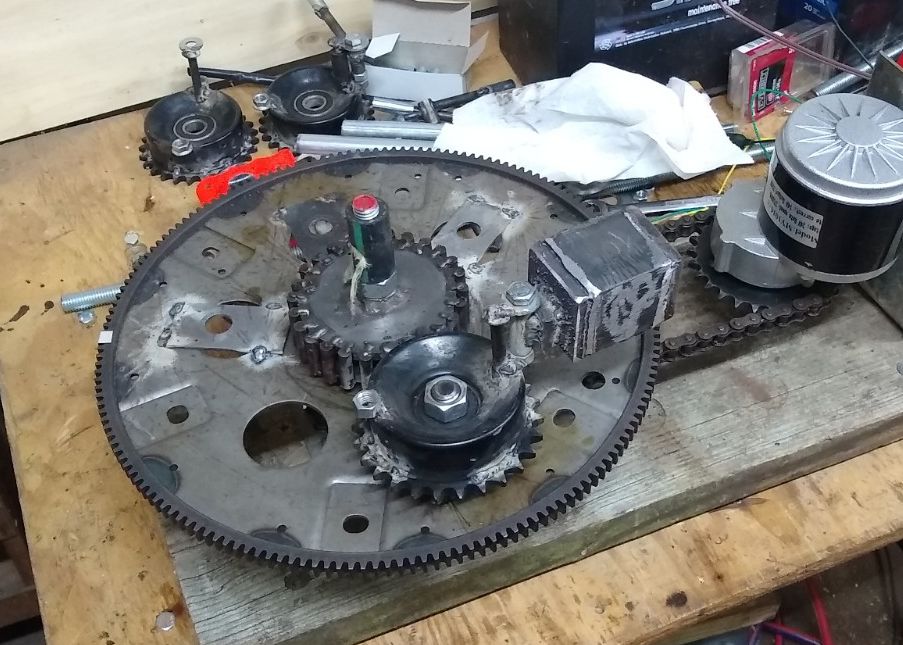
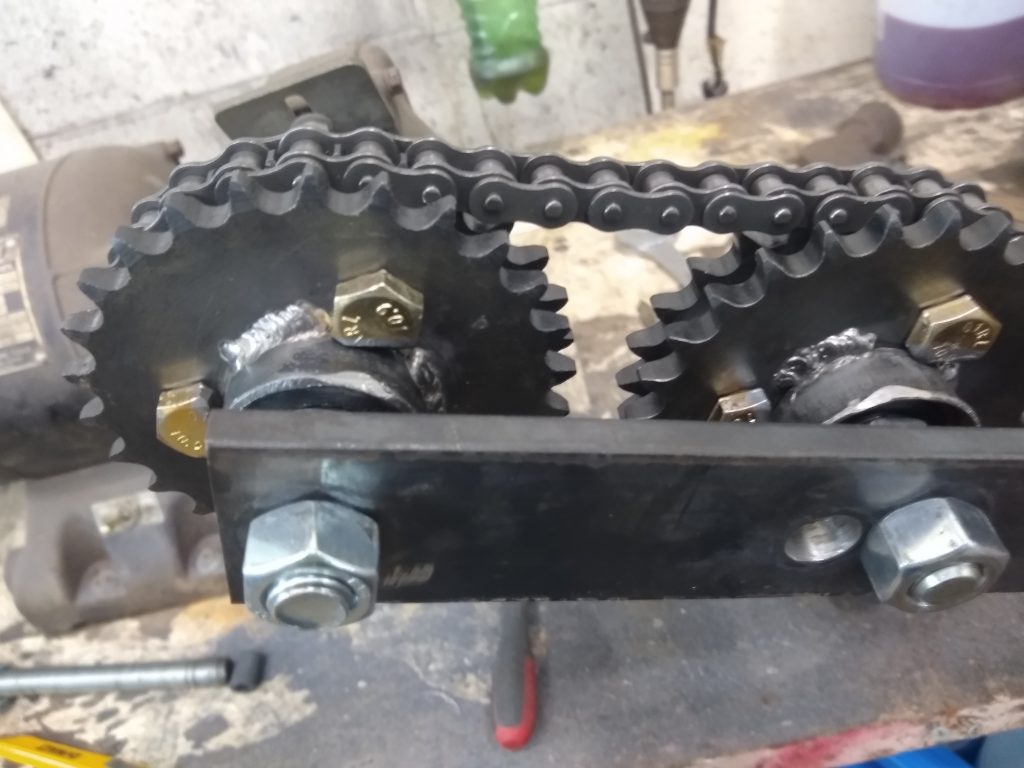
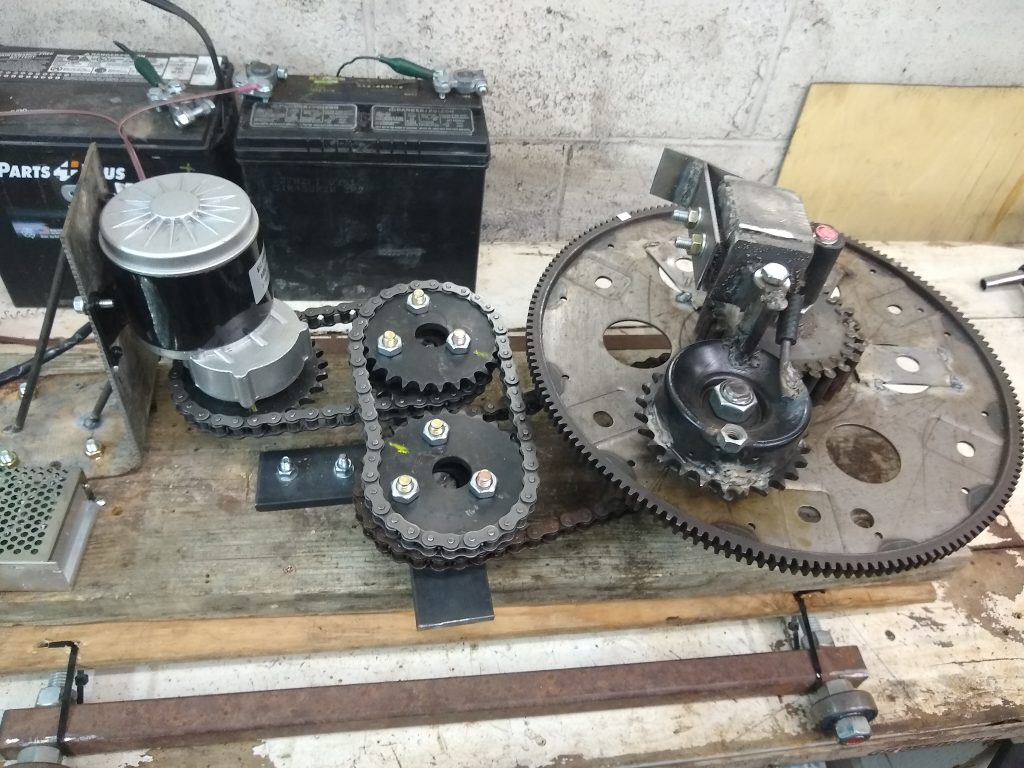
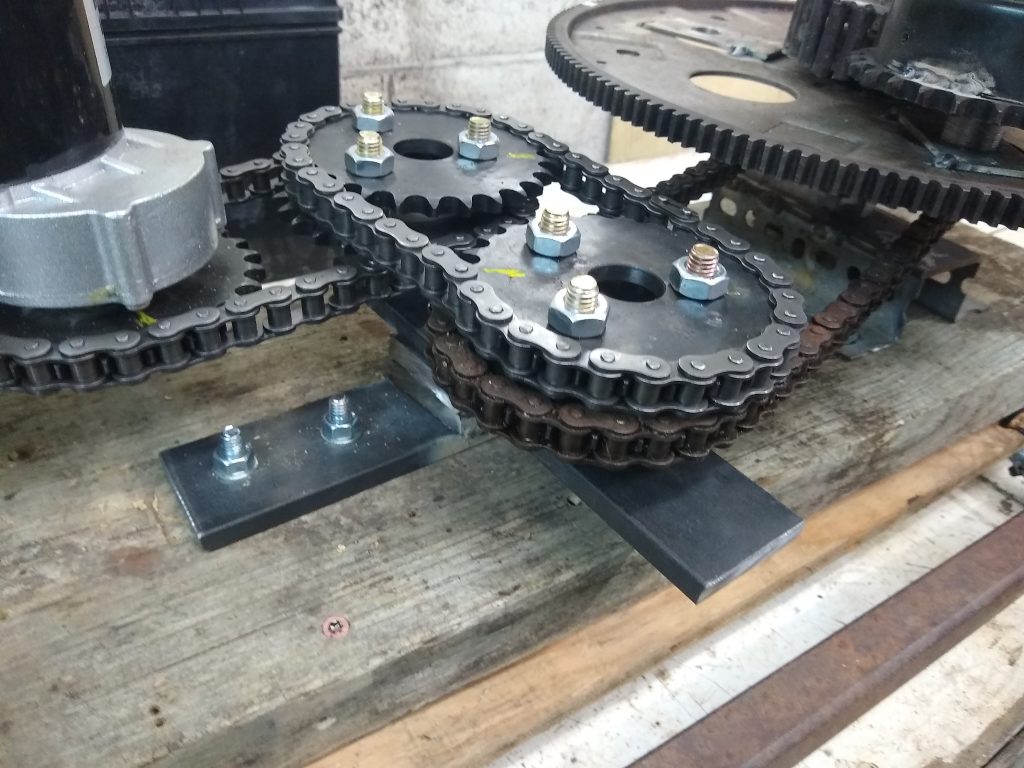
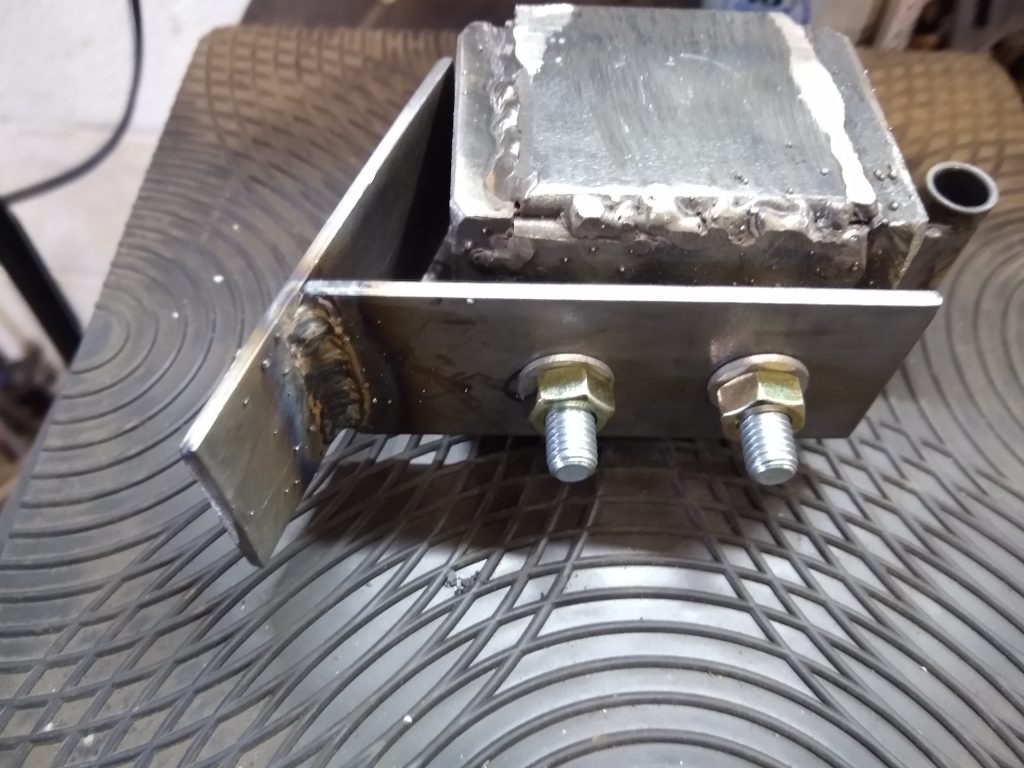
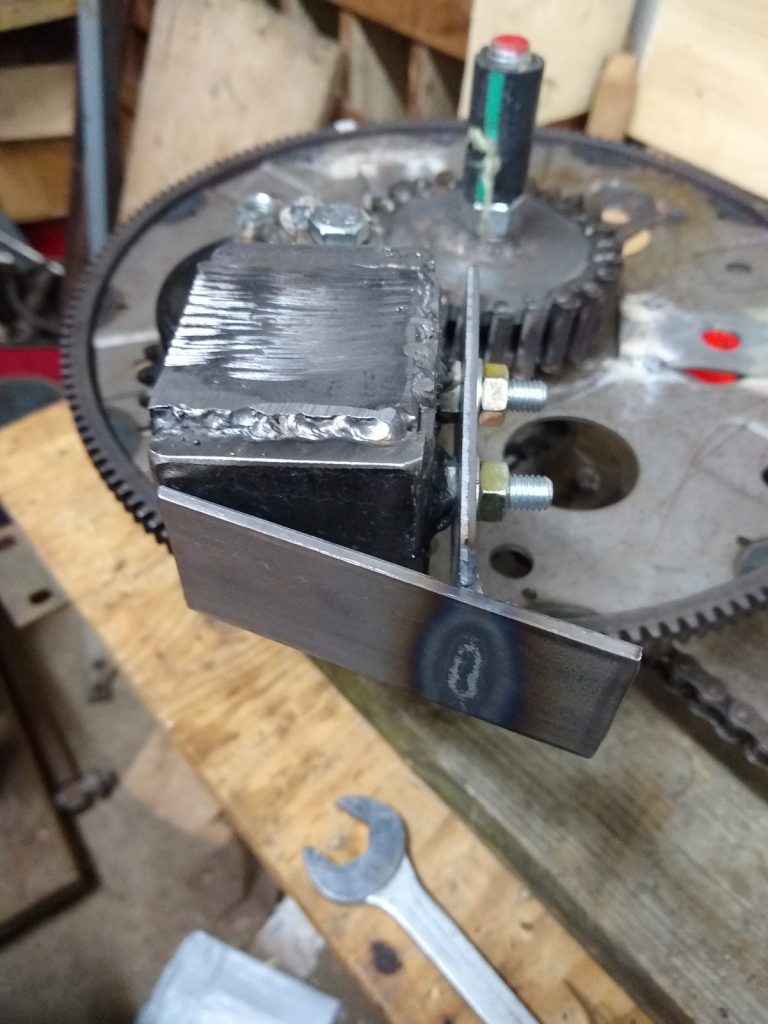
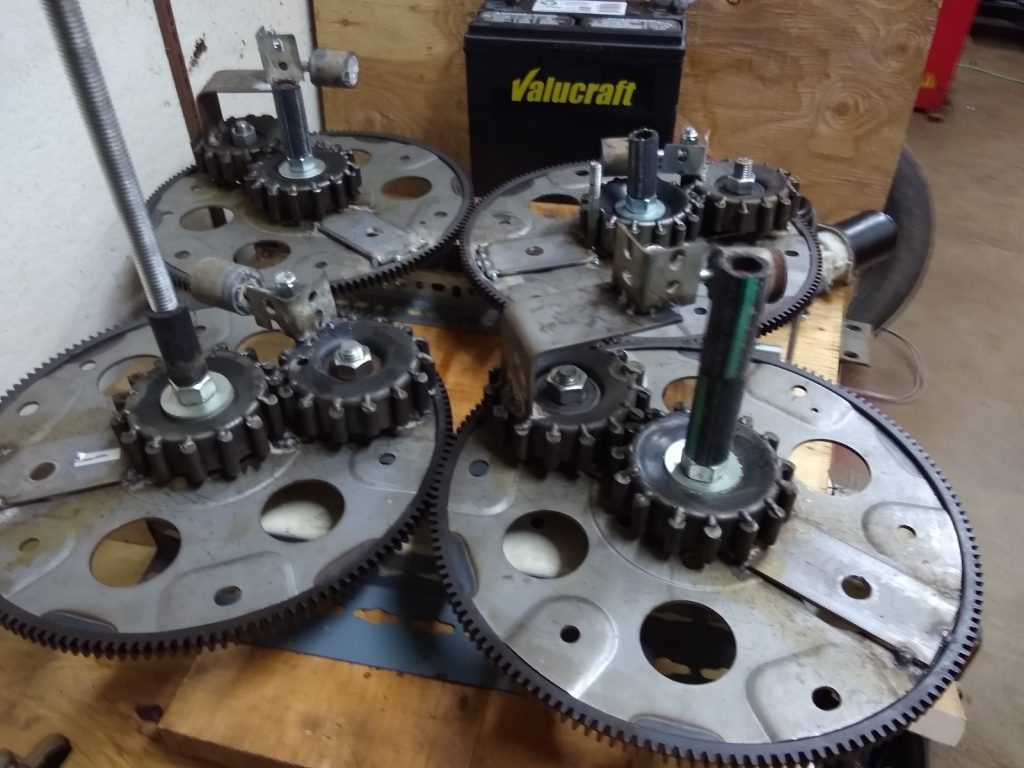
How to make steel spur gears, cheap enough to be disposable.

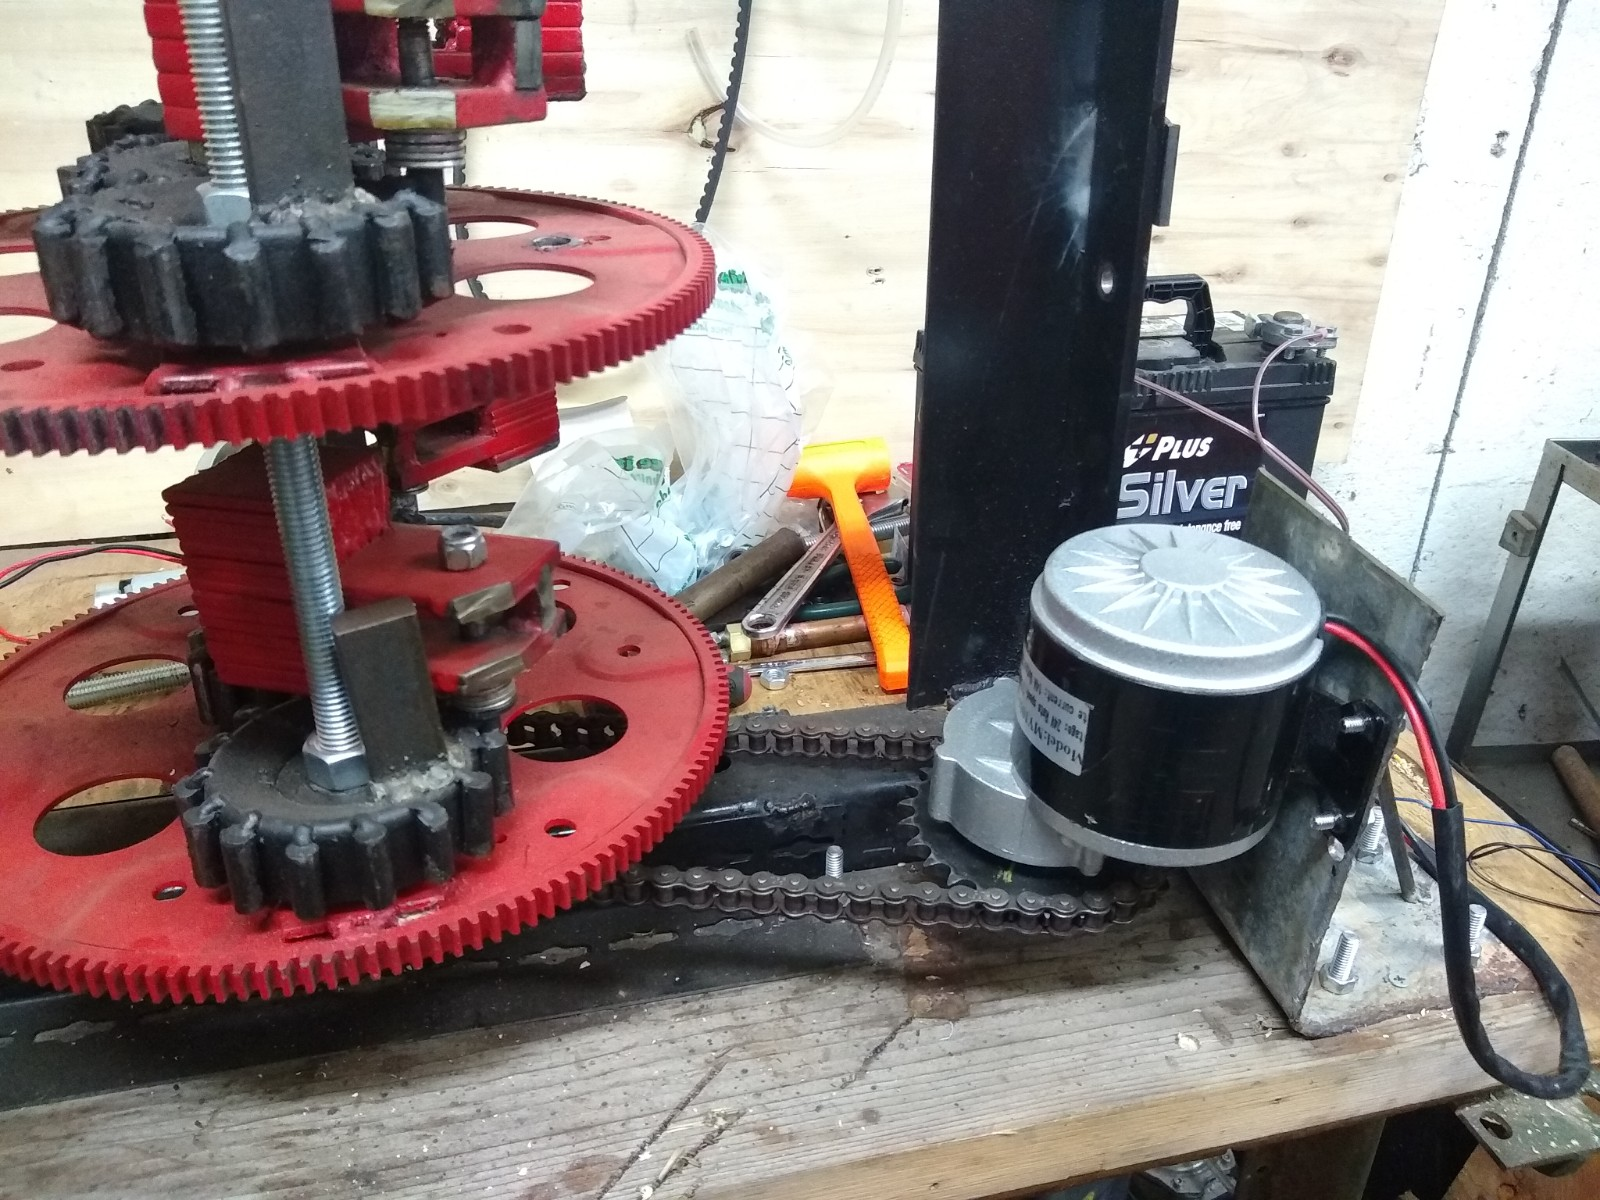
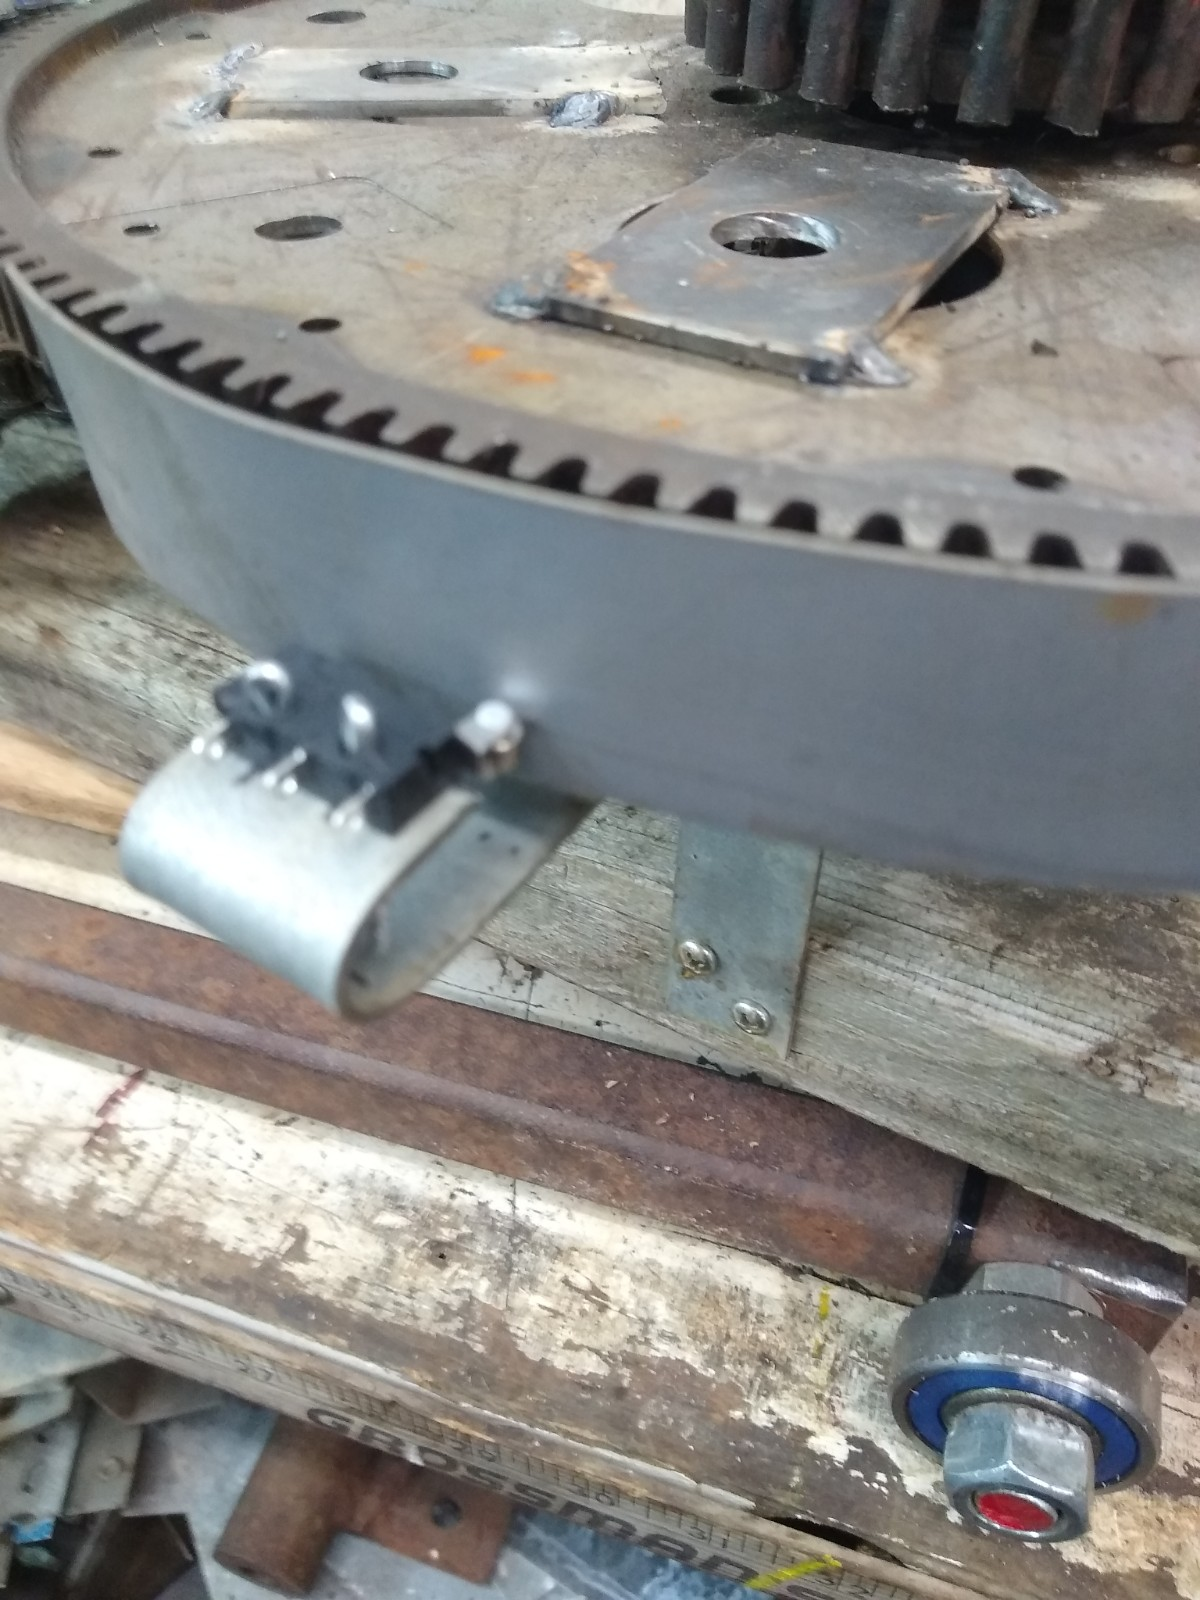
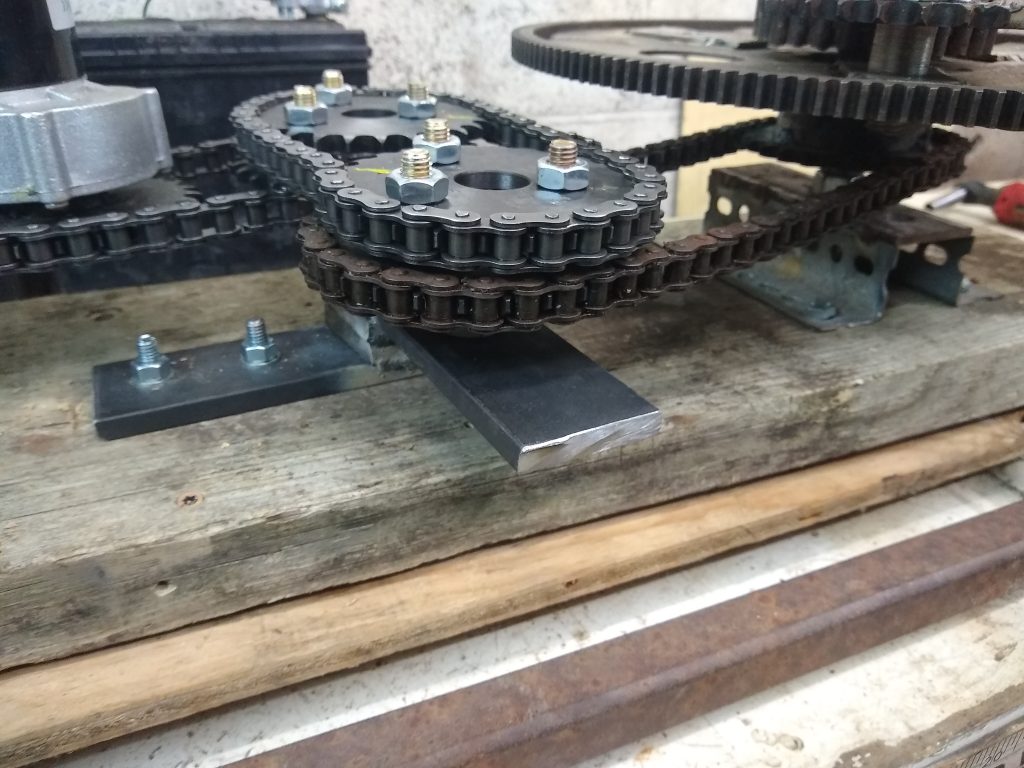
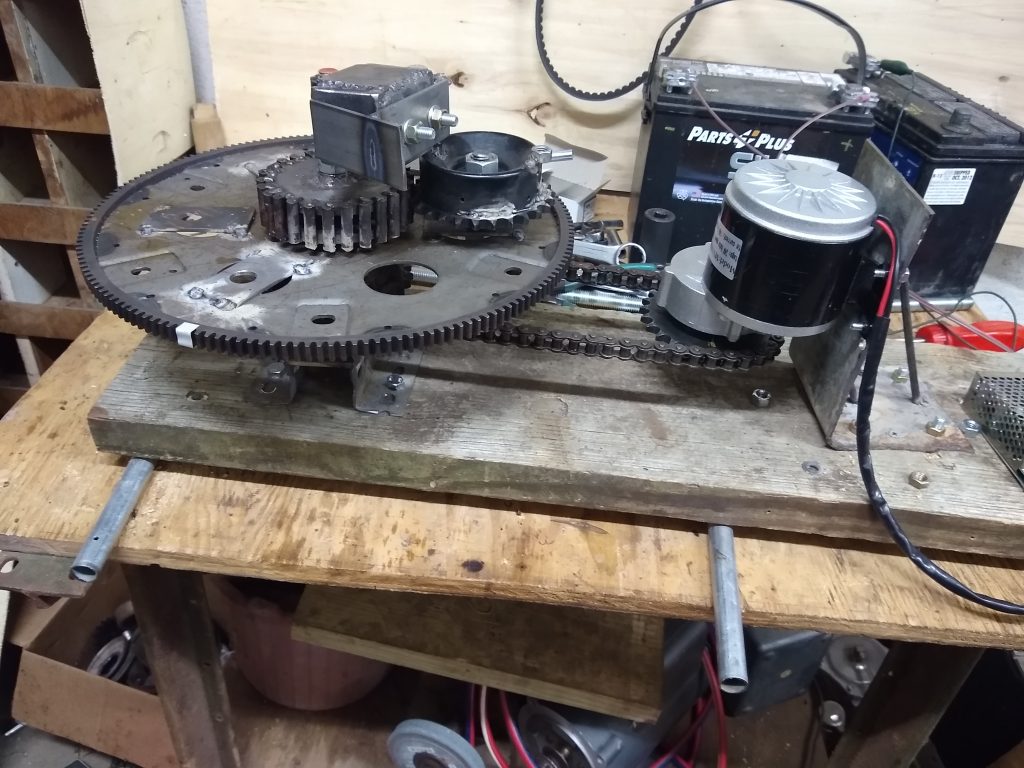
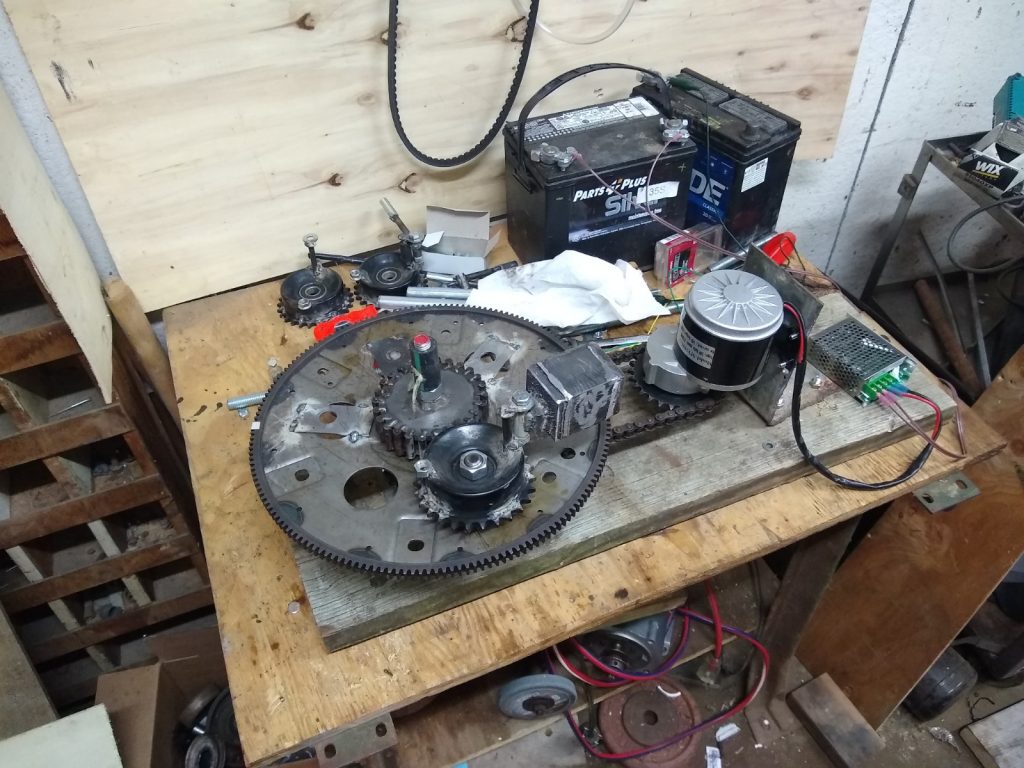
How to attach automotive flexplates to bearings for the main wheels.

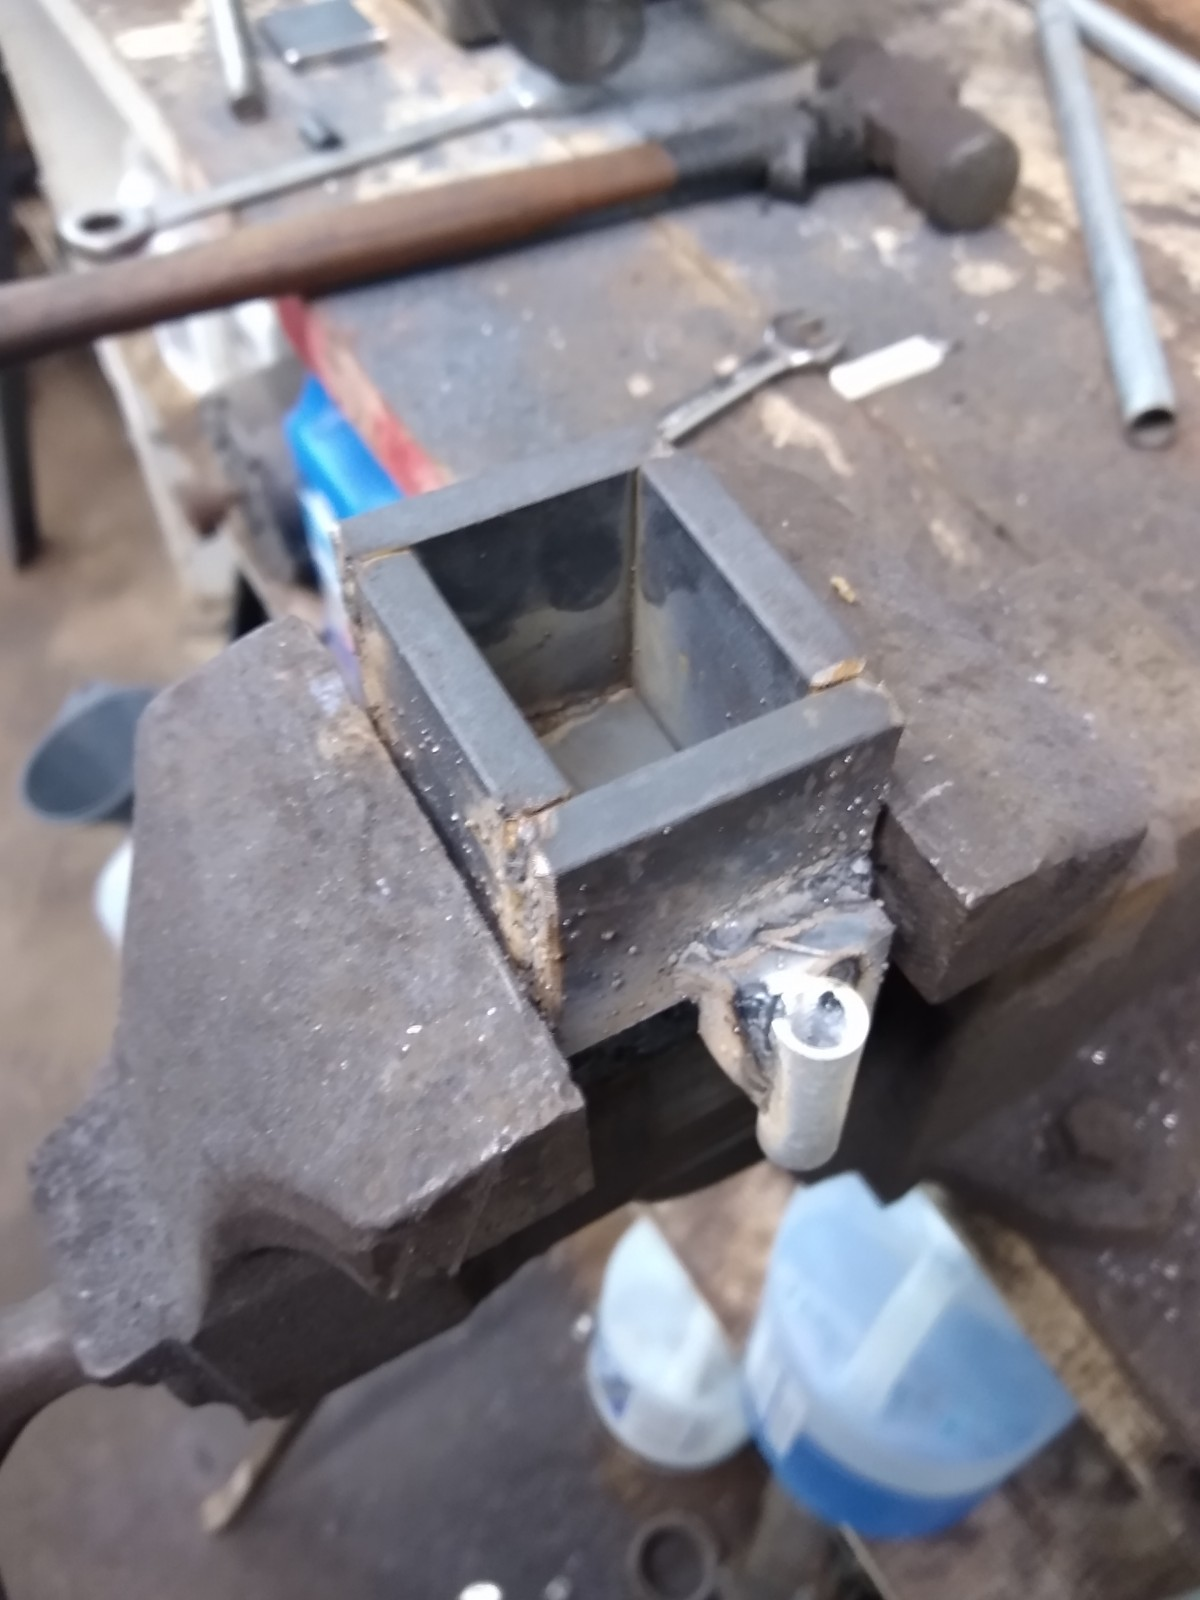
How to make different types of swinging weights.

How important the inner stop is, it does not work without it!

How to make the outer stop a part of the planet gear.

How a slipping belt can cause it to stop thrusting (chains are better).

How different configurations of gears affect performance.

How different timing affects performance and is different for hybrid use.

How a dead blow weight design enhances performance.

How performance is affected by counter rotating wheels.

How to effectively use as a hybrid “helper” drive.

How to make better steel gears.

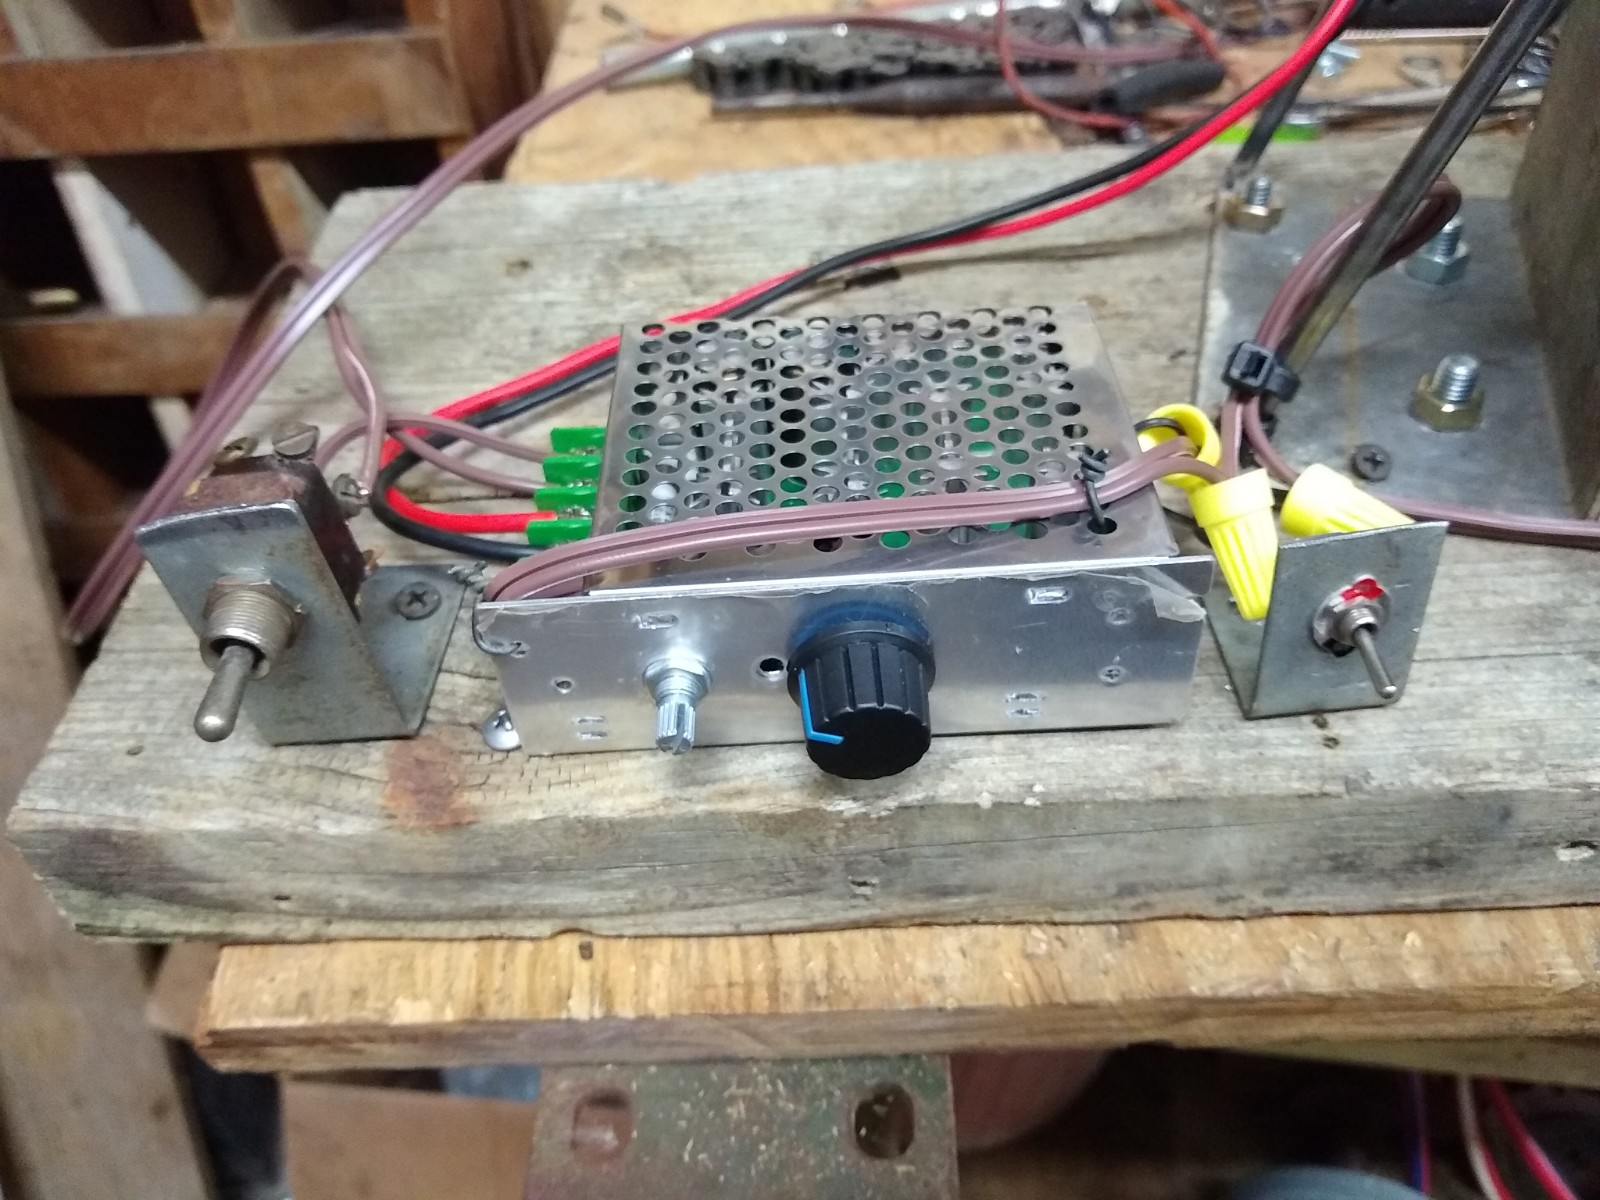
How to select the correct drive motor.

How to write a manual.

How to build a website.

How to ignore (and delete) negative comments.

How important it is to have friends who understand inertial propulsion (thanks Tokio).

How an eccentric gear design can enhance performance.

How important it is to listen to and commune with my God.

I also learned a whole lot about what does NOT work!!!

There are probably more items to add… Read the blog & watch the videos for details including some failed tests, early tests, designs that work, and designs that don’t.

I already have 2 design changes in mind for the first part of 2021, it should be exciting! I hope others get busy building too! I also hope everyone stays safe. Happy New Year!

PIETECH Page 11, PIE 4.6 Eccentric Drive Gearing

12/23/20 PIETECH Page 11, PIE 4.6 Eccentric Drive Gearing

I was going to be putting my effort into duplicating the dead blow weight so that I can test the first wheel with 2 weights, and I can build a second wheel to go with the first one. However, when I was doing the propulsion testing with the single wheel, I noticed that as by battery started running down propulsion was diminishing. This was found to be a “slow-down” of the motor during the critical “power-stroke” (those who have read my manual know what that means) causing propulsion loss. To compensate, I manually turned the knob on the speed controller during slow speed operation. Naturally, I did not meet the correct RPM every time, but I noticed that if I overshot the running RPM at exactly the right moment, the PIE 4.6 would lurch forward much stronger.

A friend of mine, who also has been working on his own inertial propulsion drive (YouTube Channel) and I were discussing this. It has been found that changing the time base in mid or quarter turns of the main wheel could enhance the propulsion effect dramatically.

My choices for this concept are to either electrically change the RPMs back and forth or use eccentric gearing to smoothly transition the RPMs thus changing the time base. In the end I may try them both or perhaps someone could find a better method.

For now, I have started this experiment with the eccentric gear setup. Eccentric gears are essentially a pair (or more) of identical gears or sprockets, with their axle’s not on center in the exact same amount. Since each will “wobble” exactly the same amount, they can be meshed together. When one it rotated at a steady RPM by an outside source (electric motor, etc.) the other one accelerates through half of its rotation and decelerates through the other half.

Eccentric Gear (Sprocket) Set

So, for my experiment I have 2 identical sprockets, each mounted on-center and each on a bearing. Then there are two more identical sprockets fastened parallel with the first ones, each mounted exactly the same amount off-center. The two off-center (or eccentric) sprockets are timed and connected together with roller chain.

Sprocket set 1 is driven by the electric motor. Sprocket set 2 is connected to the PIE 4.6 wheel. As the motor turns at a steady RPM, the PIE 4.6 is accelerating and decelerating constantly. This is timed to start the acceleration approximately halfway through the portion of the cycle when the weight is in contact with the center (inner stop) axle. Timing here is very important and even a few teeth off on the sprocket to wheel timing makes a huge difference. In fact, it has been observed that with the timing off too much, the unit would oscillate forward AND back with significant force.


Eccentric Drive Ready For Testing (Timing Was Not Correct In Picture)

Eccentric Drive Testing (Yellow Marks are for Timing Reference)

Eccentric Drive Testing (Yellow Marks are for Timing Reference)

I know that this design will not be well suited to having multiple weights on the wheel, but I do have a goal in mind that I am not ready to introduce just yet. If this idea works out, it would be capable of enhancing the operation of any of the PIE versions.

Demo of Eccentric Gears Driving the PIE 4.6

The downside is; if I only have 1 weight per wheel the RPM is limited due to transverse (sideways) forces threatening to tear it apart.

First Propulsion Bench Test for PIE 4.6

I had intended to wait and do the first true propulsion test on the 4.6 on a proper set of bearings or wheels, but I found myself with a few minutes of free time so I went into my lab area to think about “next moves” & decided that I simply wanted to see it move on its own.

So, it was nothing fancy and the battery was not “riding” along with it. No numerical data was recorded either. I simply placed two short (about 12”) lengths of ½” (12mm) conduit under the PIE 4.6 which would allow it to move freely forward and backward.

PIE 4.6 First Propulsion Test

The RPMs were slowly brought up from zero and as soon as the weight started to swing properly the PIE 4.6 moved forward only, and with a great deal of authority. I was VERY pleased, and I was truly amazed at the lack of backward movement which I am attributing to the dead blow design. I will be posting a video very soon (might be posted by the time this is being read) so please check my YouTube & BitChute channels. https://www.youtube.com/user/stclairtechrd  and https://www.bitchute.com/channel/miGkQfBM24NZ/

I will be making a couple more of these amazing Dead Blow Weights with its attached Guide (DB-G) as soon as possible so that I can see if the 4.6 will still move properly with multiple planet gears using the DB-G. From there, multiple wheels would be on the agenda along with experimentation much like those performed with the 1.0 and 2.0 such as synchronous rotation vs. counter-synchronous rotation etcetera.

It has been mentioned that the slow progress and multiple videos posted with little success tend to be frustrating. This is the methodology employed by the scientific community and by professional Model Makers worldwide.  Even though I know what I want to build, taking these slow and methodical steps allow me to eliminate component designs with inferior performance and focus on those designs with more promise. The more successful designs, to which I am adding the PIE 4.6, are the fruit of this painfully slow methodology. Regardless of anyone else’s personal beliefs (all are welcome to their own beliefs) I also acknowledge a divine inspiration fueling my own personal path of growth in this lifetime.

PIETECH Page 9 – PIE 4.5 With New Dead Blow Type Weight

The latest test of the PIE 4.5 is using a 1 kg dead blow type weight. The weight is a steel box with steel shot (BB’s) inside it. It appears to have a lot of promise, as there is virtually no “bounce” when the weight hits the inner stop, and it seems to be dampened where it would contact the outer stop if it had one (has not been installed).

PIE 4.5 with Dead Blow
Dead Blow Weight Installed On PIE 4.5

There is a video of this first testing on YouTube and BitChute. The problem however remained that the centrifugal force and impact force did not push in the same direction, which was the reason for Thornson’s “Inner Planet Trap” which would hold the weight and release at the correct time.

The answer is to install a “guide” on the end of the weight which would keep the weight near the center axle and correct the problem of thrusting in two different directions. This is proving , so far, to be a much improved design. This can also be seen on YouTube and BitChute.

Guide Fastened to Dead Blow Weight

These improvements are now bringing the PIE version up to “PIE 4.6”.

PIE 4.6 – Dead Blow Weight and Guide

Check out the videos on YouTube and BitChute & thanks for watching!

https://www.youtube.com/user/stclairtechrd

https://www.bitchute.com/channel/miGkQfBM24NZ/

PIE 4.5 and My Original Thornson Drive Replication

Hi everyone and welcome to my blog’s new home. I hope that this venue will be of at least the same quality as before, and I really hope that the text is a bit easier to read!

I posted a video on YouTube & BitChute of the PIE 4.5 with 3 gears, 2 gears and just one planet gear on it. There is a bit of controversy as to which is better and what configuration should be considered for the PIE 4.5 to continue. Watch the video and you can plainly see the lack of propulsion with better balance (3 planet gears), and much better propulsion with a fully unbalanced wheel (1 planet gear). Of course, getting rid of the jerking nature of the drive is a primary goal along with stronger propulsive force.

I have gone back and reviewed my recorded data, and videos, going all the way back to the very first truly functioning drive still being referred to as a Thornson Drive even though the stop modifications were already being changed and modified to the design finally used in the PIE system. The wheels (4 of them) all had a single planet gear, they were all running more or less in-sync, and it just plain worked. I am going to put the 3 videos I have of this original unit together into one video and post in soon.

Keeping this in mind, and knowing that I really can get a MUCH stronger forward pulse without increasing the back pulse, the goal remains to pulse smoothly (an oxymoron). For this plan to work, I need 2 or more complete PIE units that produce fairly equal amounts of force and that can run in-sync (with a calculated offset) without actually being physically mounted to the same frame.

Stay tuned to this blog and my video channels as I think some exciting things should be happening soon!